Add MQTT Data Source
This page explains the process of adding an MQTT data source in the Pirivision Port module.
After the MQTT connection is created, the data source can be used in Compass to access real-time sensor and IoT data. Queries prepared in Compass are then transformed into chart / KPI formats in Cartography and used in Horizon or Atlas dashboards.
Prerequisite
Before adding an MQTT data source, your broker connection info must be ready:
- Broker address (host/IP) and port (default: tcp 1883, ws 8083, ssl 8883, wss 8084)
- Protocol (
tcp,ws,ssl,wss) - Username/password if authentication is required
Information Needed Before Adding
| Information | Description | Default | Example |
|---|---|---|---|
| Name | Display name given to the data source inside Pirivision | — | Factory MQTT |
| Description | Purpose of the data source | — | MQTT for Example |
| Protocol | MQTT connection protocol | tcp |
ws, wss, tcp, ssl |
| Host | IP address or hostname of the MQTT broker | — | <mqtt-server>, 192.168.1.10 |
| Port | Port the MQTT broker is listening on | 8083 |
1883, 8083, 8883 |
| Path | Path for WebSocket connection (in ws/wss protocols) | /mqtt |
/mqtt |
| Keep Alive Time | Connection keep-alive interval (seconds) | 60 |
30, 60, 120 |
| Username | Broker authentication username (optional) | — | mqtt |
| Password | Broker authentication password (optional) | — | mqtt |
Connection Protocol
Protocol selection depends on broker configuration:
- tcp — Standard MQTT (default port: 1883)
- ssl — Secure MQTT / TLS (default port: 8883)
- ws — MQTT over WebSocket (default port: 8083)
- wss — Secure WebSocket MQTT (default port: 8084)
Keep Alive
The Keep Alive interval lets the broker detect unresponsive connections. Typical value: 60 seconds.
1. Open the Port Module
Click Port in the left menu.
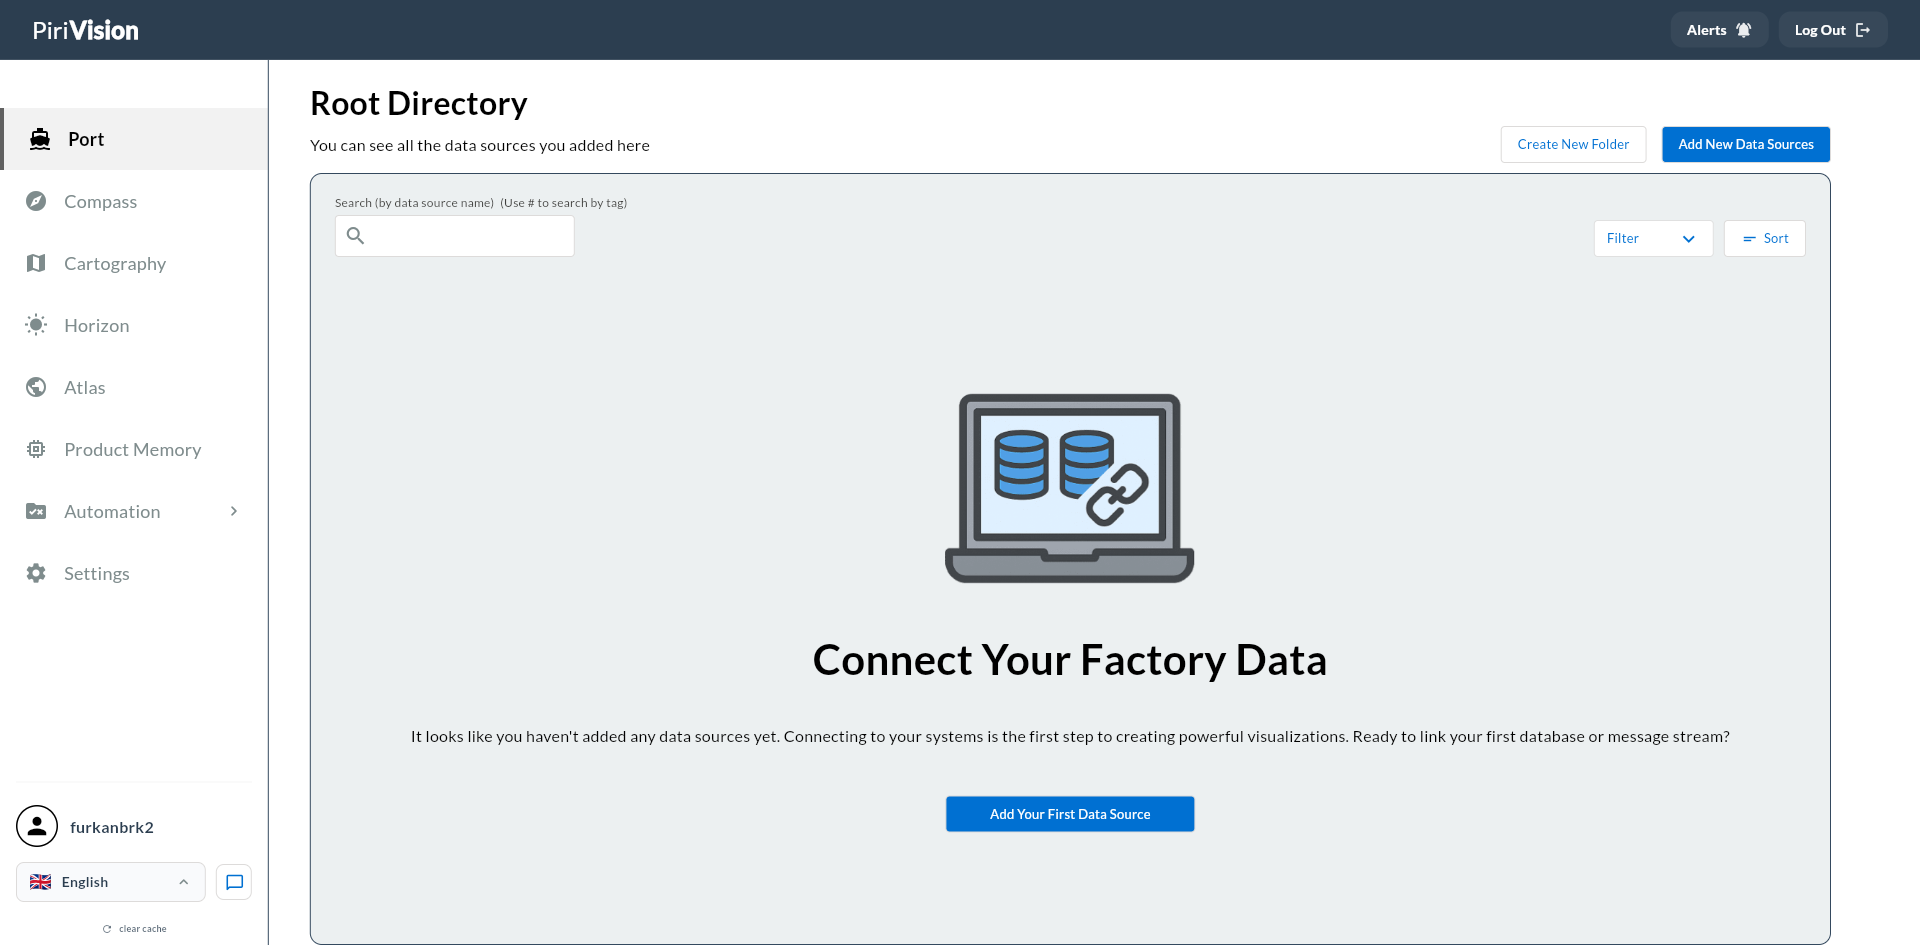
If no data source has been added before, Connect Your Factory Data is shown. Use Add New Data Sources or Add Your First Data Source.
2. Start the Add New Data Source Flow
Click Add New Data Sources at the top right.
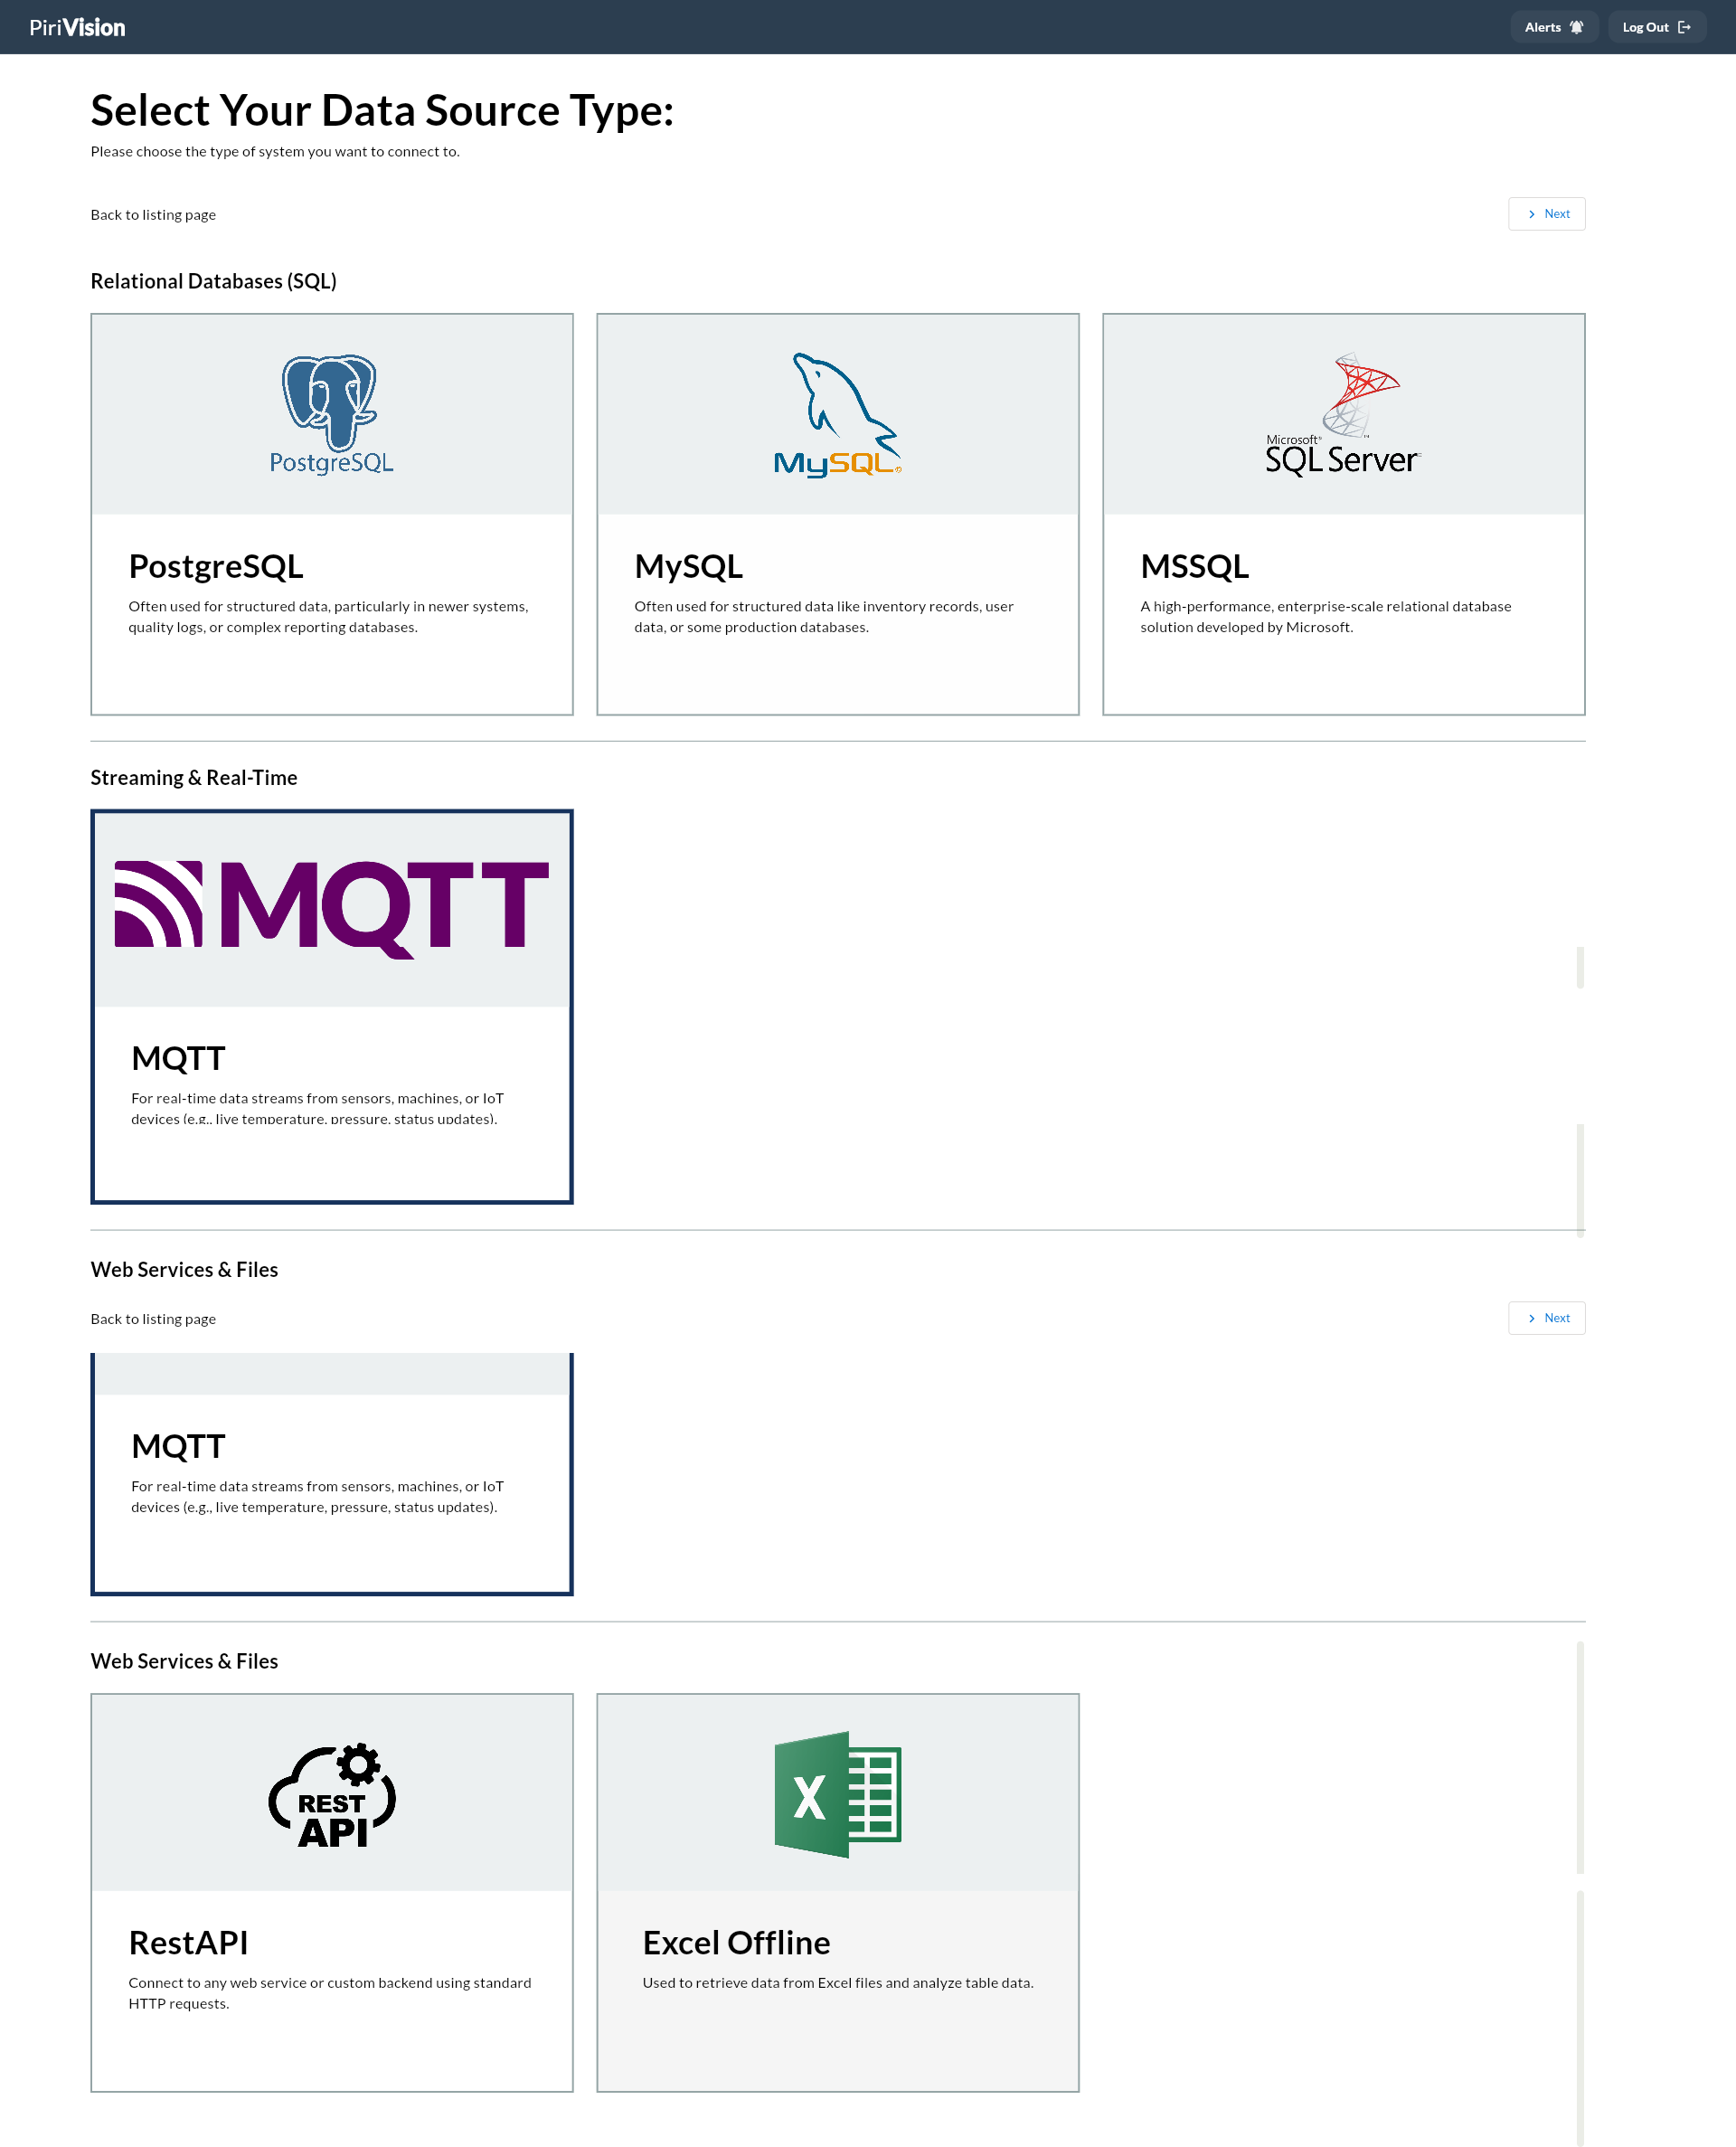
3. Select the MQTT Data Source Type
Under Select Your Data Source Type:
- Go to the Streaming & Real-Time section.
- Pick the MQTT card.
- Click Next at the top right.
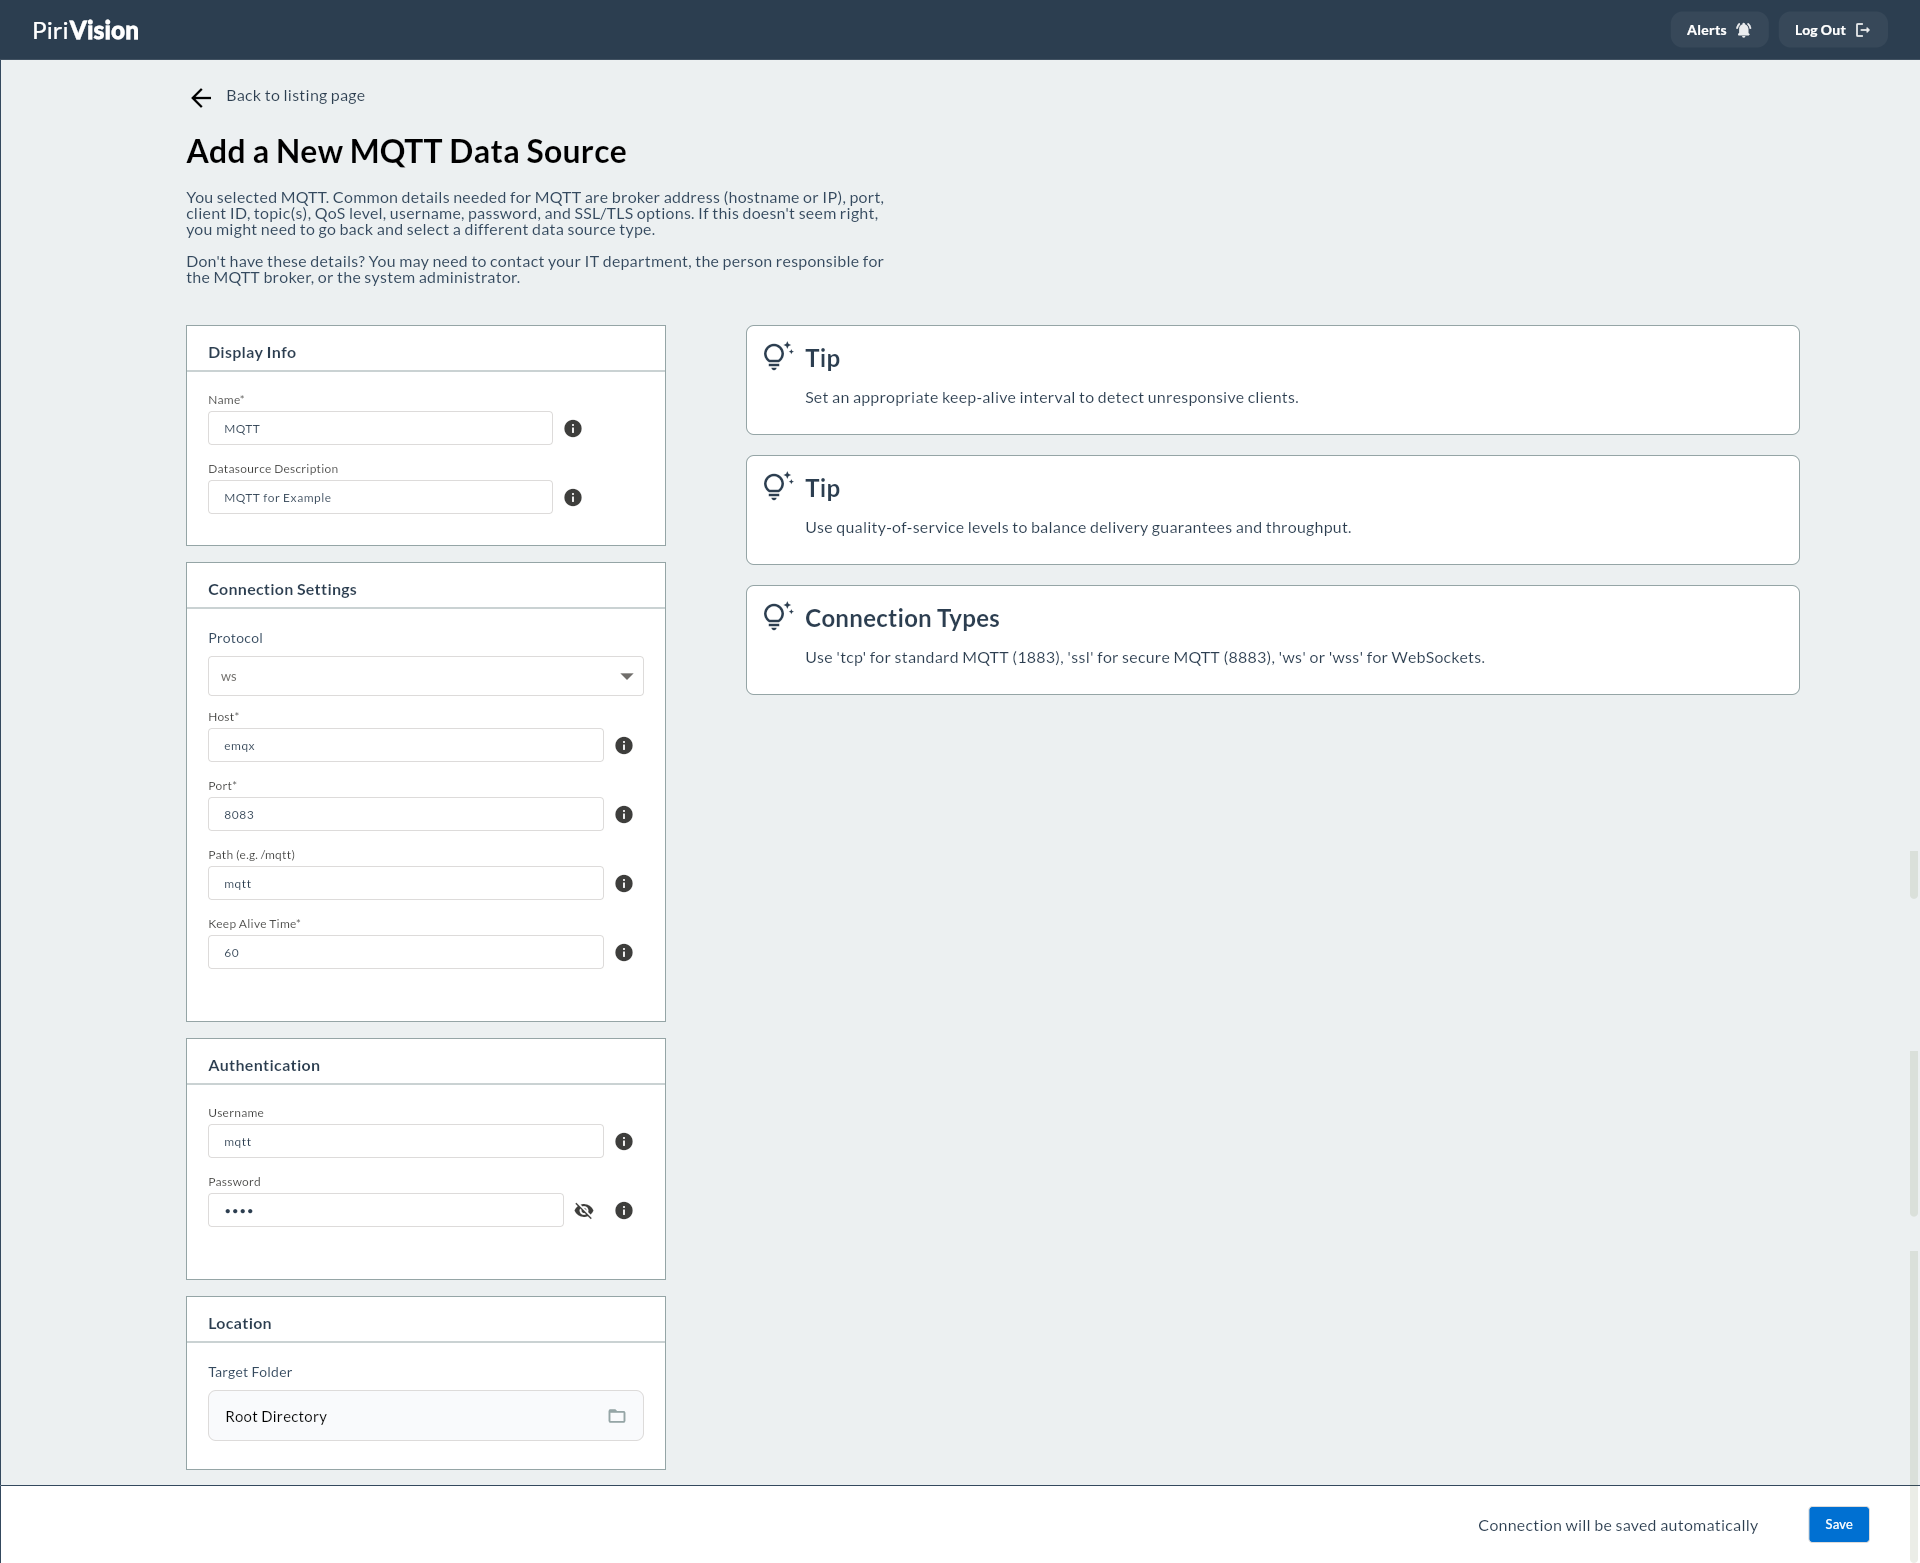
4. Fill in the MQTT Form
After MQTT is selected, the Add a New MQTT Data Source screen opens.
The form consists of four main sections:
- Display Info
- Connection Settings
- Authentication
- Location
5. Display Info
| Field | Required | Description | Default | Example |
|---|---|---|---|---|
| Name | Yes | The name used to identify the data source within Pirivision. | — | Factory MQTT |
| Description | No | A short note explaining what the data source is for. | — | MQTT for Example |
Name
Good examples:
Description
Example:
6. Connection Settings
| Field | Required | Description | Default | Example |
|---|---|---|---|---|
| Protocol | Yes | Connection protocol (WebSocket or TCP based) | ws |
ws, tcp, ssl |
| Host | Yes | IP or hostname of the MQTT broker | — | <mqtt-server> |
| Port | Yes | Port the broker is listening on | 8083 |
1883, 8083 |
| Path | No | WebSocket path; required only for ws/wss protocols |
/mqtt |
/mqtt |
| Keep Alive Time | Yes | Connection keep-alive ping interval (seconds) | 60 |
30, 60, 120 |
Protocol
Pick based on the transport type your broker supports.
| Protocol | Use Case | Typical Port |
|---|---|---|
ws |
Web-based applications (over HTTP) | 8083 |
wss |
Secure web connection (HTTPS/TLS) | 8084 |
tcp |
Standard MQTT clients | 1883 |
ssl |
TLS-encrypted MQTT clients | 8883 |
Host
Network address of the server where the MQTT broker runs.
Examples:
Warning
The Pirivision server must be able to reach the MQTT broker host over the network.
Port
Default value:
Typical port values per protocol:
Path
Required only for ws and wss protocols. Specifies the broker's WebSocket endpoint path.
Default value:
Keep Alive Time
Ping interval that checks connection liveness between the broker and the client. In seconds.
Default value:
Tip
For IoT devices that send data frequently, use a low value (e.g. 30). For long-interval sensors, 60 or 120 may be preferred.
7. Authentication
Broker credentials are entered in the Authentication section. If the MQTT broker does not require authentication, these fields can be left blank.
| Field | Required | Description | Default | Example |
|---|---|---|---|---|
| Username | No | MQTT broker username | — | mqtt |
| Password | No | Broker authentication password | — | mqtt |
Security
In production, restricting broker access with username/password is recommended. These fields can be left blank in environments that allow anonymous connections.
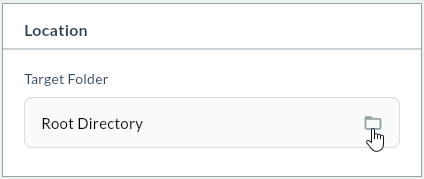
8. Location
| Field | Description | Default |
|---|---|---|
| Target Folder | Folder where the data source is saved | Root Directory |
When you click the Target Folder field, the folder selection dialog opens.
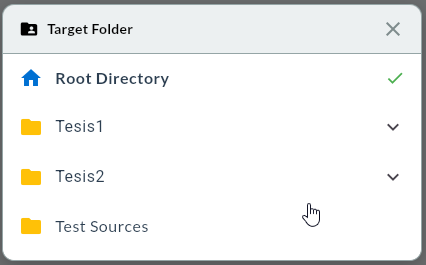
Example folder layout:
PORT/
├── Plant 1/
│   ├── MQTT Sensors/
│   ├── SCADA/
│   └── Energy/
├── Plant 2/
│   └── MQTT/
└── Test Sources/
9. Save the Connection
After all required fields are filled in, click Save at the bottom right.
MQTT Connection Test
Unlike SQL data sources, an instant connection test is not performed when saving an MQTT data source. Connection status is verified per-topic in the Compass module.
Success
On a successful save, the MQTT data source is listed on the Port screen and becomes available for real-time data queries in Compass.
Failure
If the broker cannot be reached after the data source is created, check host, port, protocol, and network access info.
10. Verify the Data Source in the List
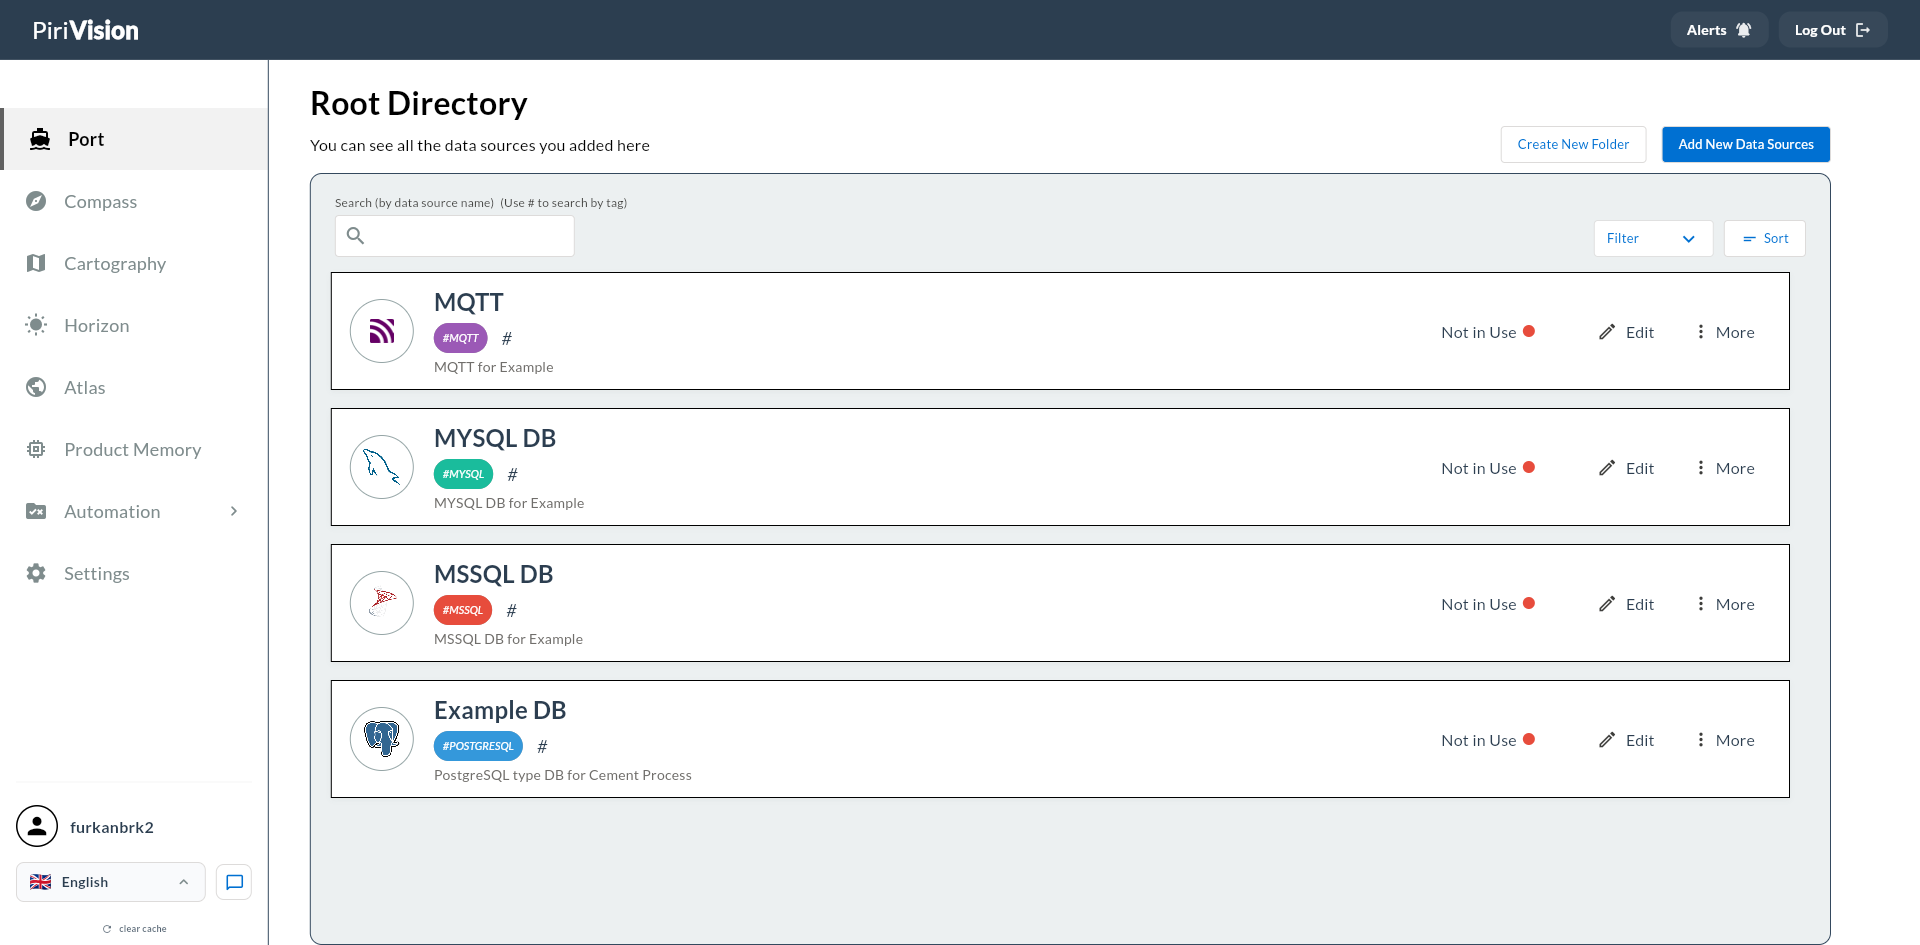
| Field / Action | Description |
|---|---|
| Data source icon | Indicates this is an MQTT data source. |
| Name | Data source name. |
| Description | Description text. |
| Usage status | In Use or Not in Use info. |
| Edit | Updates connection info. |
| More | Opens the additional actions menu. |
| ↳ Move | Moves the data source. → Move Data Source |
| ↳ Duplicate | Creates a new copy. → Duplicate Data Source |
| ↳ Delete | Removes the data source. → Delete Data Source |
11. Common Errors
| Error / Symptom | Possible Cause | Solution |
|---|---|---|
| Cannot connect to broker | Host wrong or unreachable | Check IP/hostname info and network access. |
| Timeout / connection drop | Wrong port or firewall blocked | Check broker port and firewall rules. |
Connection refused |
Broker service not running | Verify the MQTT broker service (EMQX, etc.) is running. |
| Authentication error | Wrong username/password | Verify broker credentials. |
| WebSocket cannot connect | Wrong Protocol or Path | For ws/wss make sure Path is /mqtt. |
| Connected but no data | No topic registered | Define topic registrations for this data source in the Compass module. |
| SSL/TLS certificate error | Broker certificate not trusted | Check the broker's TLS configuration and certificate validity. |
| Will not save | Required field missing | Make sure Host and Port fields are filled in. |
12. Next Step
After the MQTT data source is created in the Port module, the process continues with Compass, Cartography, Horizon, and Atlas.
flowchart LR
    A["Port<br/>MQTT Data Source"] --> B["Compass<br/>MQTT Topic Query"]
    B --> C["Cartography<br/>Chart / KPI"]
    C --> D["Horizon<br/>Page / Board Preparation"]
    D --> E["Atlas<br/>Dashboard View"]
Real-Time Data Stream
MQTT data sources are managed in Compass via a dedicated MQTT Explorer screen. Topics are defined there, and the real-time data stream is bound to Cartography widgets through this.
Summary
The MQTT data source addition process:
- Open the Port module.
- Click the Add New Data Sources button.
- Pick MQTT as the data source type (Streaming & Real-Time section).
- Fill in the Display Info fields.
- Fill in the Connection Settings fields (Protocol, Host, Port, Path, Keep Alive Time).
- Enter Authentication info (optional).
- Choose the Target Folder.
- Save the connection.
- Verify the data source in the Port list.
- Create an MQTT topic record in the Compass module.