Add PostgreSQL Data Source
This page explains the process of adding a PostgreSQL data source in the Pirivision Port module.
After the PostgreSQL connection is created successfully, the data source can be used for SQL queries in the Compass module. Queries prepared in Compass are then transformed into chart / KPI formats in Cartography and used in Horizon or Atlas dashboards.
Prerequisite
Before adding a PostgreSQL data source, the following must be ready:
- PostgreSQL server host/IP and port (default: 5432)
- Database name and schema (default:
public) - Username, password, and database access rights
- Network access from the Pirivision server (firewall/VPN)
Information Needed Before Adding
| Information | Description | Default | Example |
|---|---|---|---|
| Name | Display name given to the data source inside Pirivision | — | Process DB |
| Description | Purpose of the data source | — | PostgreSQL type DB for Process Data |
| Schema | PostgreSQL schema name | public |
postgres, production |
| Database Name | Name of the database to connect to | — | process_db |
| Host | IP address or domain of the PostgreSQL server | — | pirivision.digitheta.dev |
| Port | PostgreSQL connection port | 5432 |
5433, 15432 |
| Username | Database username | — | postgres |
| Password | User's password | — | postgres |
Default PostgreSQL Port
The default port for PostgreSQL is usually 5432. Custom installations may use a different port.
1. Open the Port Module
Click Port in the left menu. Port is the module where data sources are added, listed, edited, and tested in Pirivision.
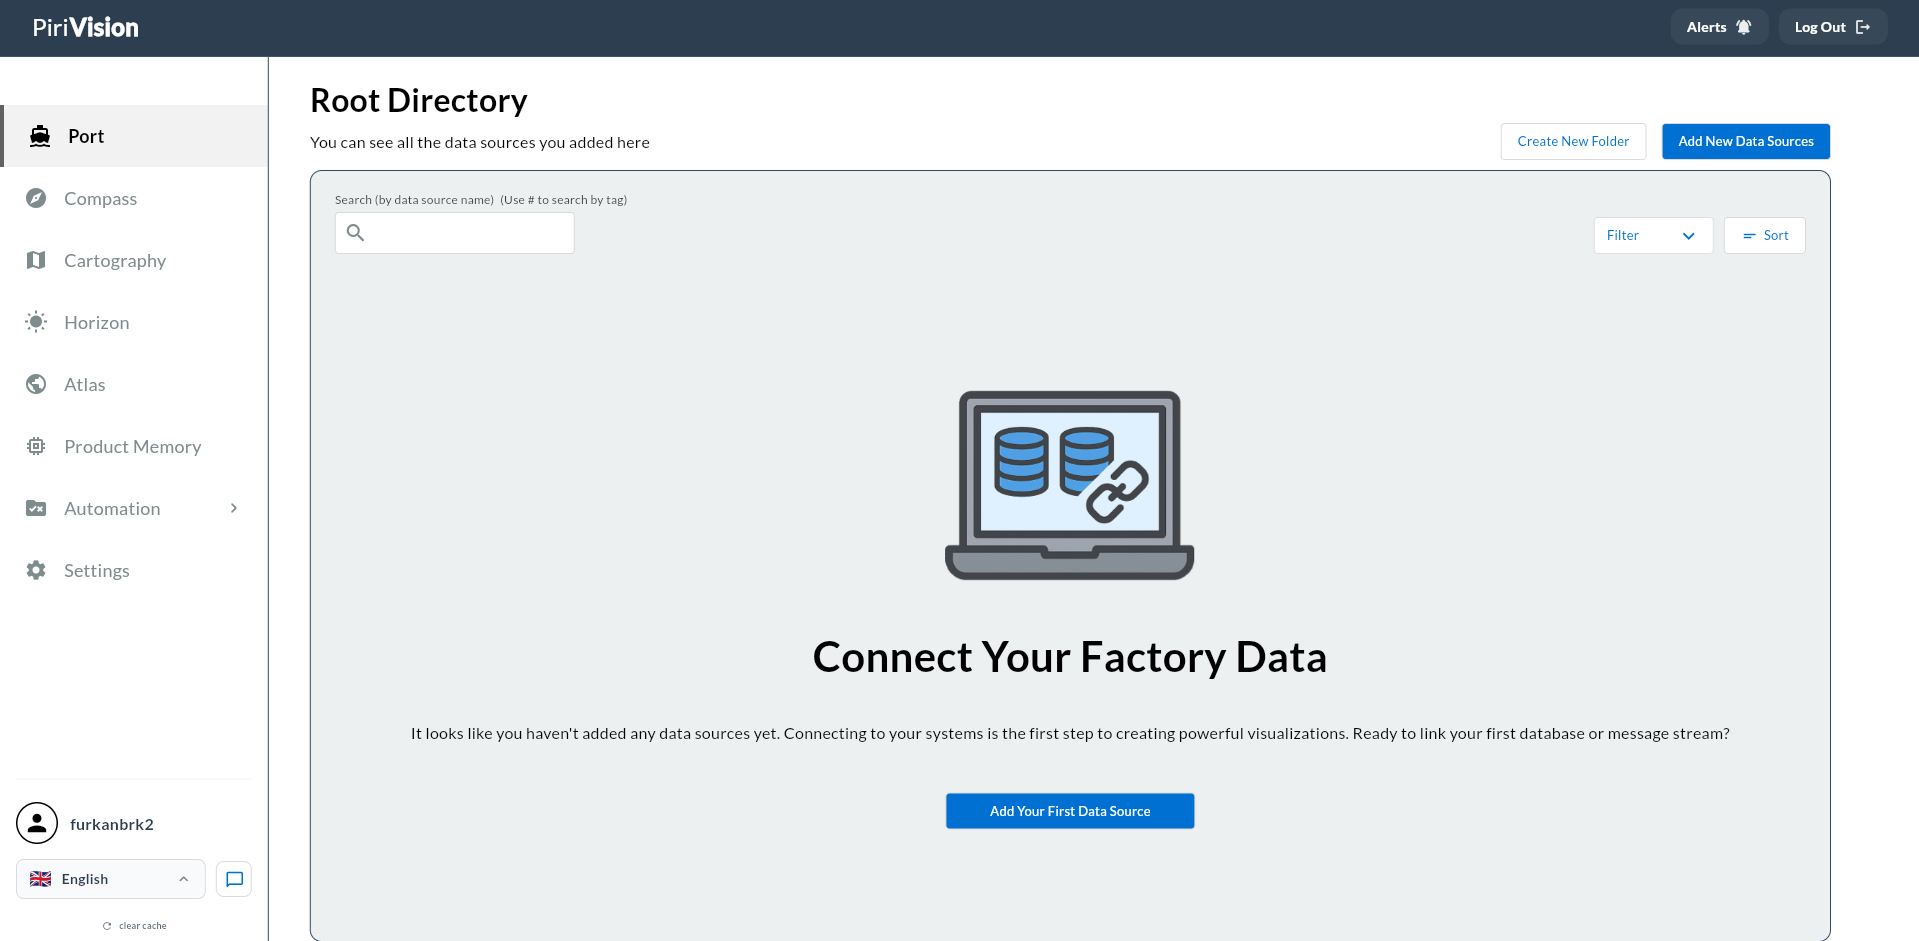
If no data source has been added before, the screen shows a Connect Your Factory Data message.
To add a data source from this screen you can use one of:
- Add New Data Sources
- Add Your First Data Source
2. Start the Add New Data Source Flow
Click the Add New Data Sources button at the top right.
If you are on the empty list screen, the Add Your First Data Source button in the middle starts the same flow.
3. Select the PostgreSQL Data Source Type
In the screen that opens, data source types are listed under Select Your Data Source Type.
To add PostgreSQL:
- Go to the Relational Databases (SQL) section.
- Pick the PostgreSQL card.
- Click Next at the top right.
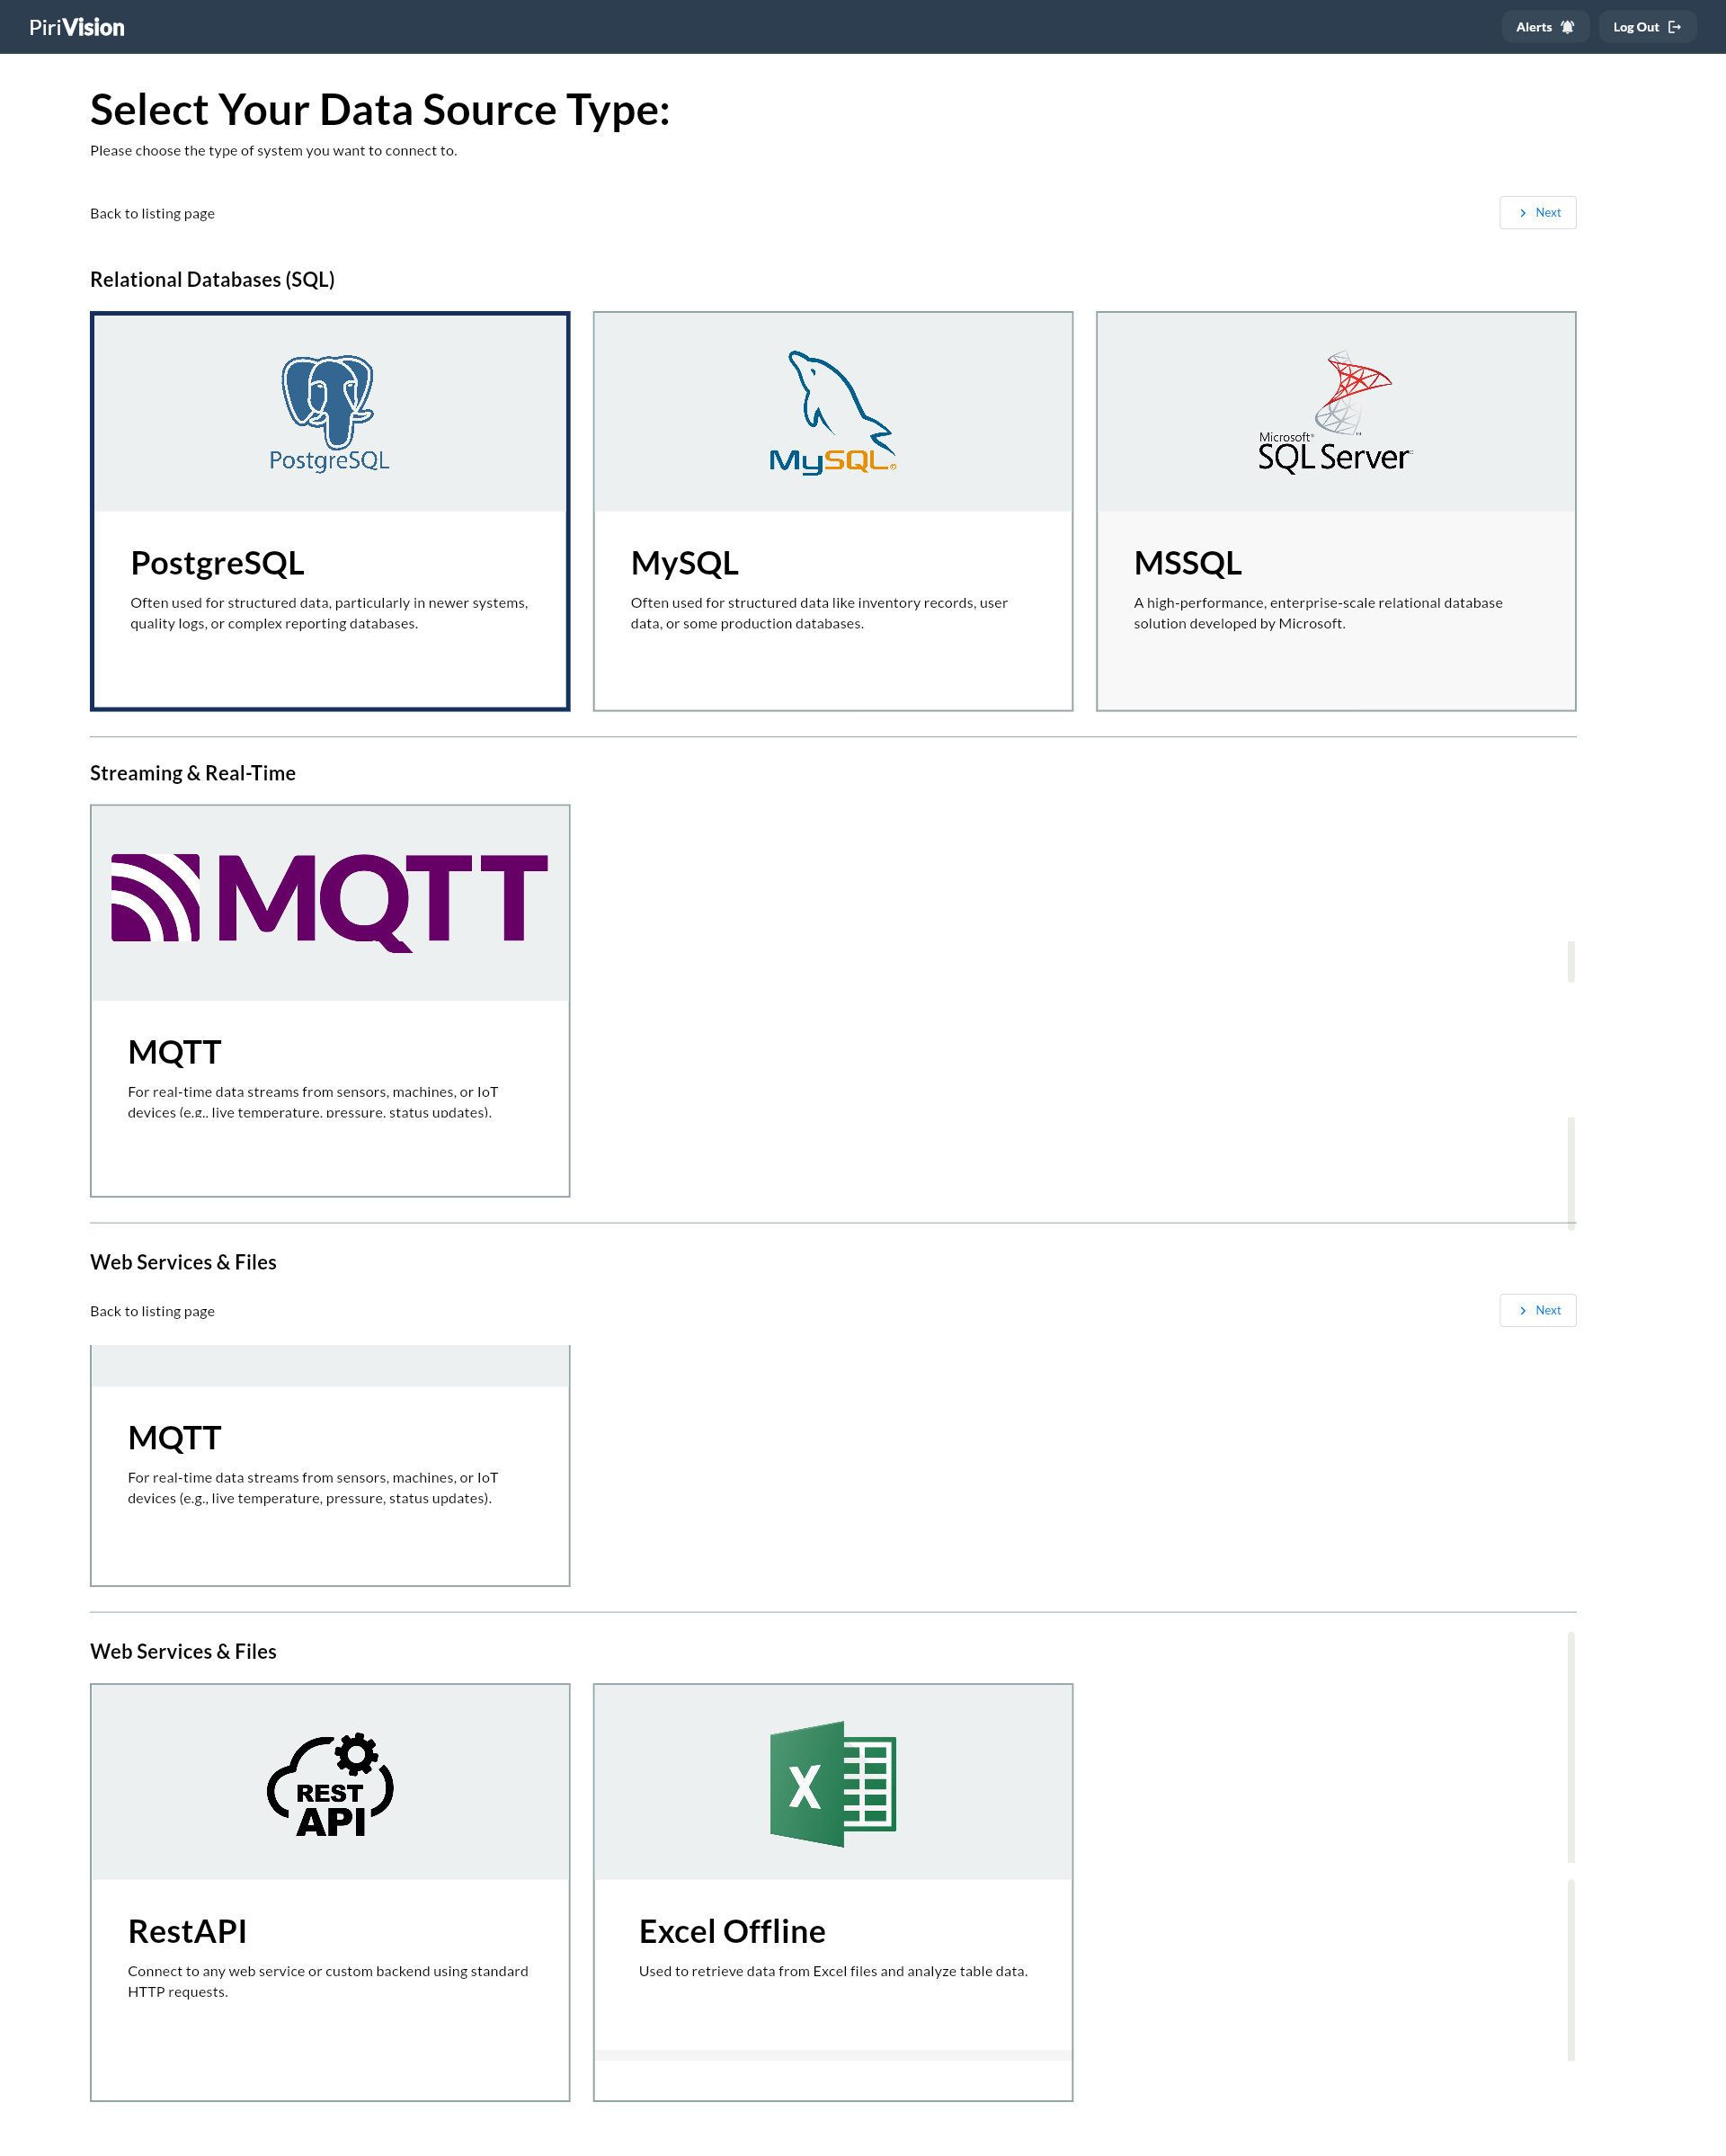
Info
For relational database connections, Pirivision offers PostgreSQL, MySQL, and MSSQL options.
4. Fill in the PostgreSQL Form
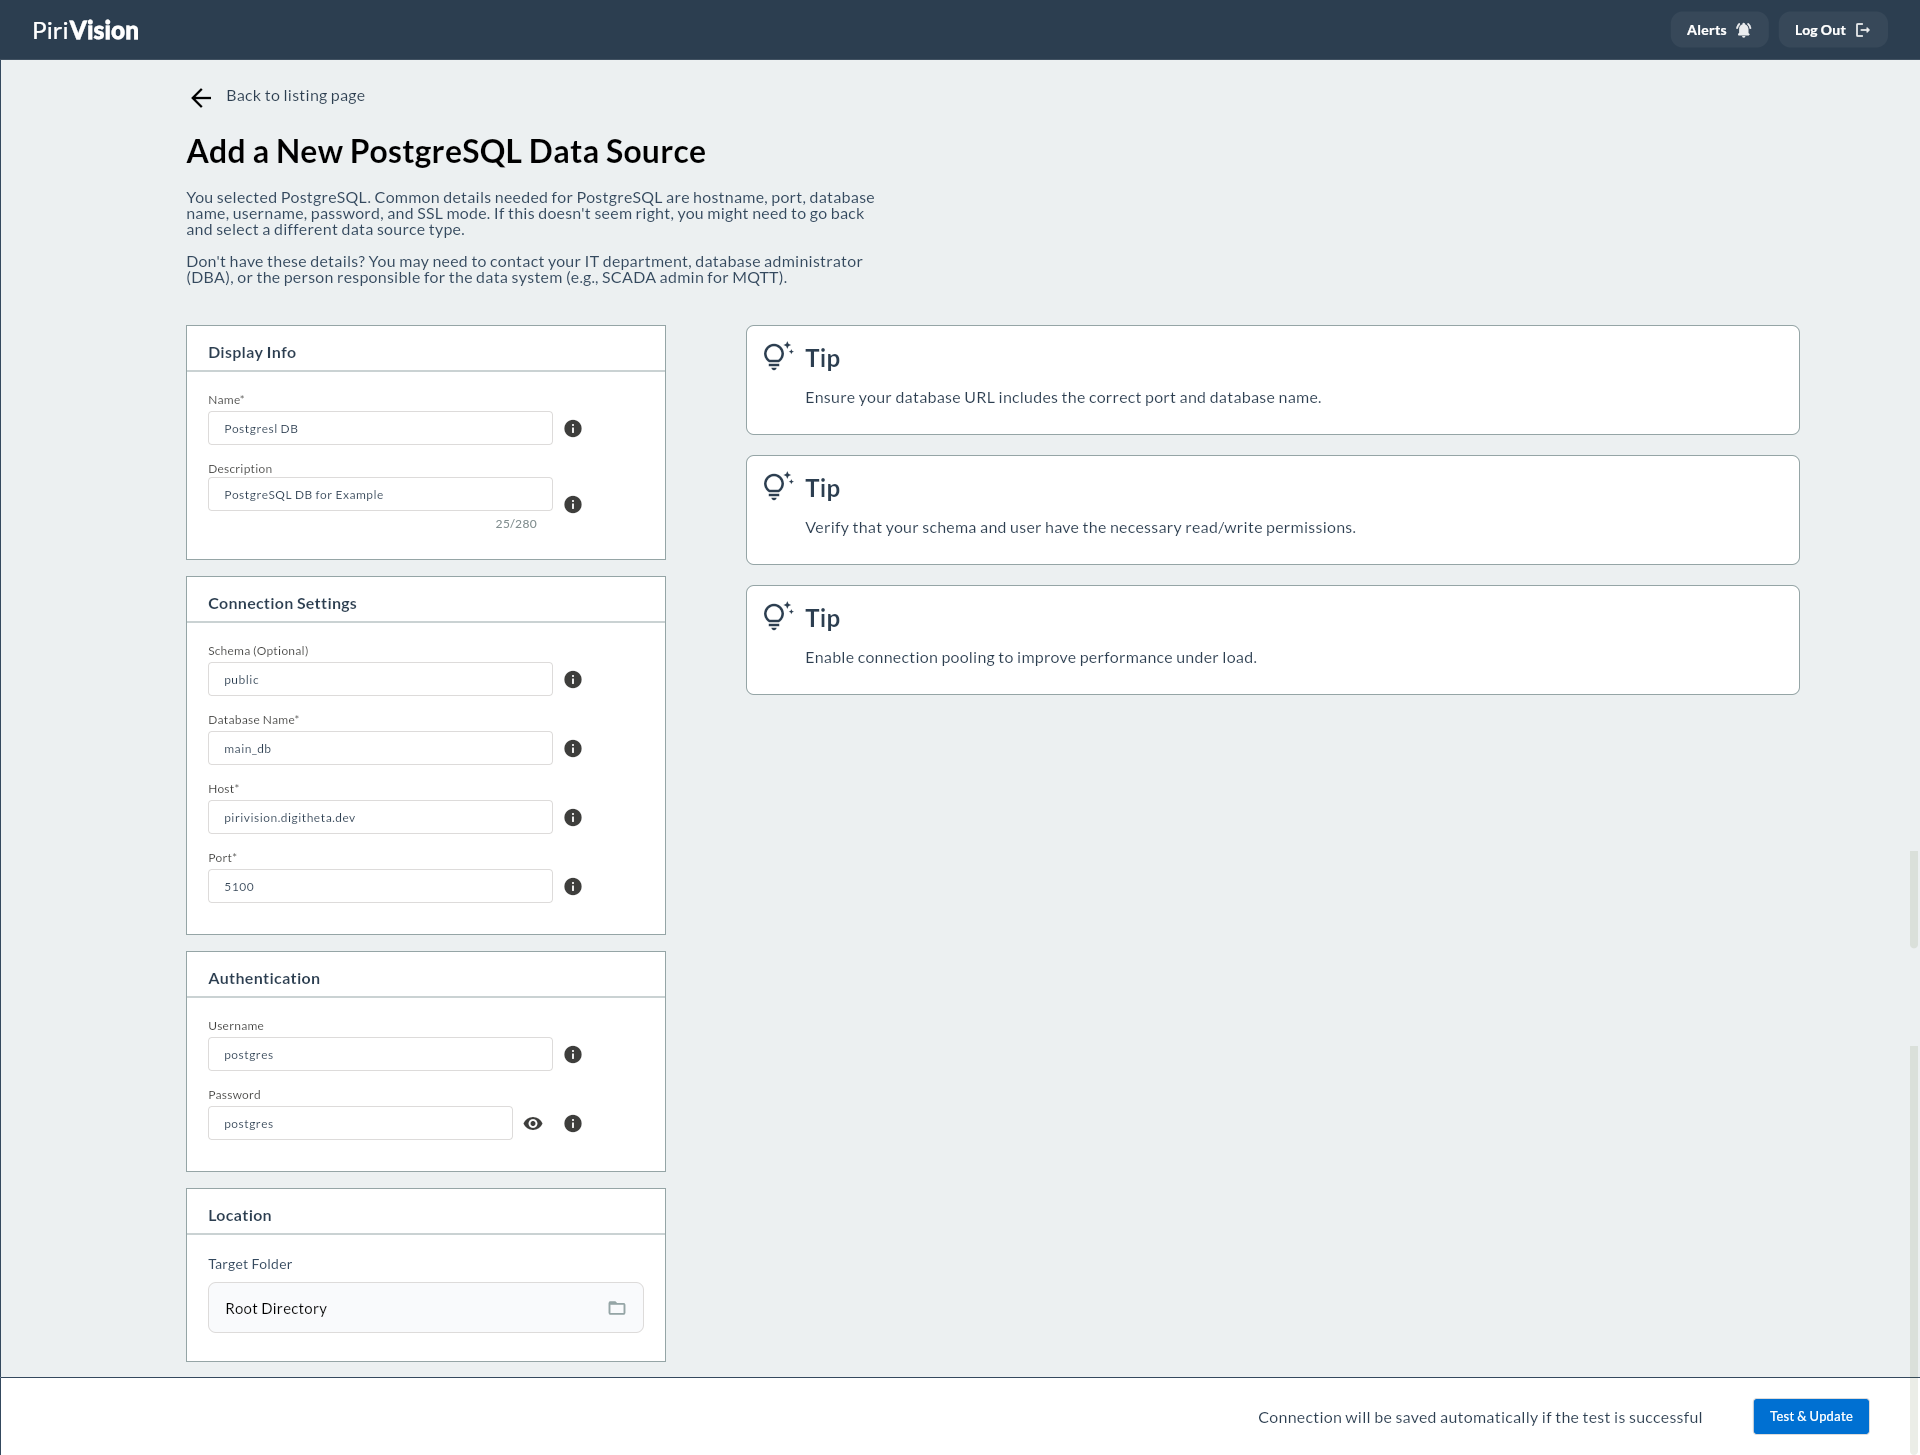
After PostgreSQL is selected, the Add a New PostgreSQL Data Source screen opens.
The form consists of four main sections:
- Display Info
- Connection Settings
- Authentication
- Location
5. Display Info
Display Info determines how the data source appears in the Pirivision UI.
| Field | Required | Description |
|---|---|---|
| Name | Yes | The name used to identify the data source within Pirivision. |
| Description | No | A short note explaining what the data source is for. |
Name
Used to identify this data source on panels and lists.
Good examples:
Bad examples:
Naming Recommendation
Combine plant, system, and data type info in the data source name. For example: Plant1_SCADA_PostgreSQL.
Description
An optional field that explains what this connection is for.
Example:
6. Connection Settings
Connection Settings contains the technical info required to connect to the PostgreSQL server.
| Field | Required | Description | Default | Example |
|---|---|---|---|---|
| Schema | No | Logical group containing tables and views in PostgreSQL. | public |
production, reporting |
| Database Name | Yes | Name of the database you want to connect to. | — | process_db |
| Host | Yes | IP address or domain of the PostgreSQL server. | — | pirivision.digitheta.dev |
| Port | Yes | Port the PostgreSQL server is listening on. | 5432 |
5433, 15432 |
Schema
A schema in PostgreSQL is a logical group used to organize tables, views, and other database objects. Most installations use public unless specially configured.
Common values:
Note
If tables are kept under a special schema, the correct schema name must be entered. Otherwise, tables or views may not be found in Compass.
Database Name
The full name of the database to connect to on the server.
Examples:
Host
The network address of the server where the PostgreSQL database runs.
Examples:
Warning
The Pirivision server must be able to reach the PostgreSQL host address over the network. Just because you can connect from your computer does not mean the Pirivision server can.
Port
The PostgreSQL connection port.
Default value:
Custom installation examples:
7. Authentication
Database user info is entered in the Authentication section.
| Field | Required | Description | Example |
|---|---|---|---|
| Username | Yes | PostgreSQL username | postgres |
| Password | Yes | The user's password | postgres |
Username
The username authorized to connect to the database and run queries.
Examples:
Permission Recommendation
For dashboard reads, it is safer to create a separate user with read-only access to only the necessary tables. For example: pirivision_readonly.
Password
The password for this user. The password field is hidden. It can be temporarily revealed via the eye icon if needed.
Security
Do not display the database password in plain text in documents, screenshots, or shareable media.
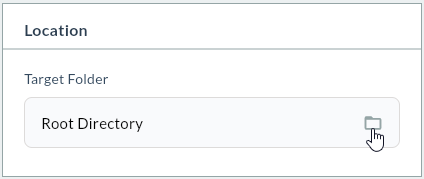
8. Location
Location determines where the created data source is stored in the Pirivision folder structure.
| Field | Description | Example |
|---|---|---|
| Target Folder | Folder where the data source is saved | PORT |
When you click the Target Folder field, the folder selection dialog opens:
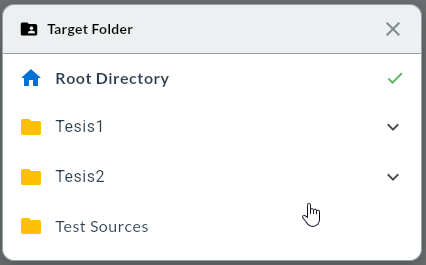
Example folder layout:
PORT/
├── Plant 1/
│   ├── SCADA/
│   ├── MES/
│   └── Quality/
├── Plant 2/
│   ├── SCADA/
│   └── Energy/
└── Test Sources/
9. Save the Connection With Test & Save
After all required fields are filled in, click the Test & Save button at the bottom right.
This works in two stages:
- The PostgreSQL connection is tested.
- If the test succeeds, the data source is saved automatically.
The screen shows:
Success
If the test is successful, the PostgreSQL data source is listed on the Port screen and becomes available for query creation in Compass.
Failure
If the test fails, check host, port, database name, username, password, schema, and network access info.
10. Verify the Data Source in the List
After a successful save, returning to the Port main screen shows the created PostgreSQL data source in the list.
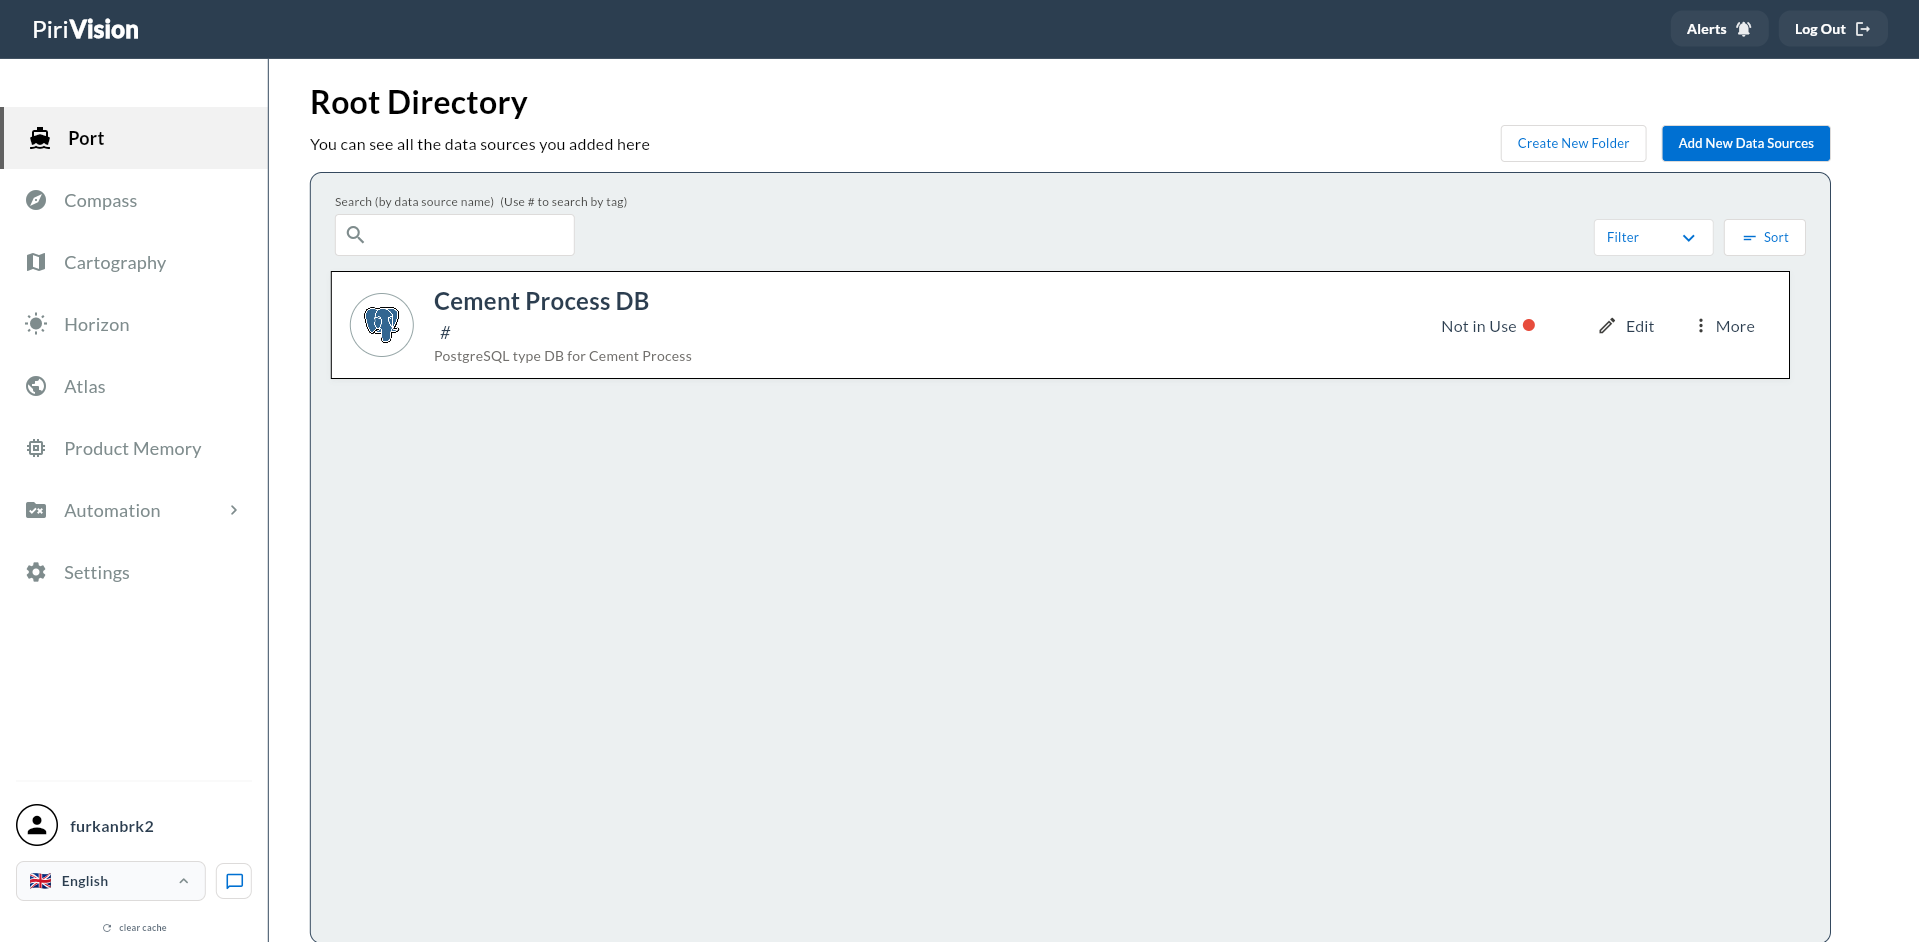
The list card shows the following info and actions:
| Field / Action | Description |
|---|---|
| Data source icon | Indicates this is a PostgreSQL data source. |
| Name | Data source name. |
| Description | Description text. |
| Usage status | In Use or Not in Use info. |
| Edit | Updates connection info. → Edit PostgreSQL Data Source |
| More | Opens the additional actions menu. |
| ↳ Move | Moves the data source to a different folder. → Move Data Source |
| ↳ Duplicate | Creates a new copy with the same settings. → Duplicate Data Source |
| ↳ Delete | Removes the data source. → Delete Data Source |
Delete Operation
The delete operation may not be reversible. If the data source is used by a query, chart, or dashboard, check dependencies before deleting.
If the data source is not yet used in Compass or a dashboard, the status typically reads:
11. Common Errors
| Error / Symptom | Possible Cause | Solution |
|---|---|---|
| Cannot connect | Host is wrong or unreachable | Check IP/domain info and network access. |
| Timeout | Server unreachable or firewall blocked | Check firewall, VPN, security group, and network settings. |
| Authentication failed | Wrong username or password | Verify username/password info. |
| Database does not exist | Wrong database name | Check the actual database name in PostgreSQL. |
| Permission denied | The user lacks privilege | Grant the user the required schema/table permissions. |
| Relation not found | Wrong schema or table name | Check schema and table names. |
| SSL error | The server requires SSL or SSL mode mismatch | Check the PostgreSQL SSL configuration. |
| Will not save | Test failed | The connection is not saved unless the test succeeds. |
12. Next Step
After the PostgreSQL data source is created in the Port module, the process continues with Compass, Cartography, Horizon, and Atlas.
flowchart LR
    A["Port<br/>PostgreSQL Data Source"] --> B["Compass<br/>SQL Query"]
    B --> C["Cartography<br/>Chart / KPI"]
    C --> D["Horizon<br/>Page / Board Preparation"]
    D --> E["Atlas<br/>Dashboard View"]
Summary
The PostgreSQL data source addition process:
- Open the Port module.
- Click the Add New Data Sources button.
- Pick PostgreSQL as the data source type.
- Fill in the Display Info fields.
- Fill in the Connection Settings fields.
- Enter the Authentication info.
- Choose the Target Folder.
- Use Test & Save to test and save the connection.
- Verify the data source in the Port list.
- Create a SQL query in the Compass module.
- Create a chart / KPI in the Cartography module.
- Prepare a page or board in Horizon.
- Build the dashboard view in Atlas.