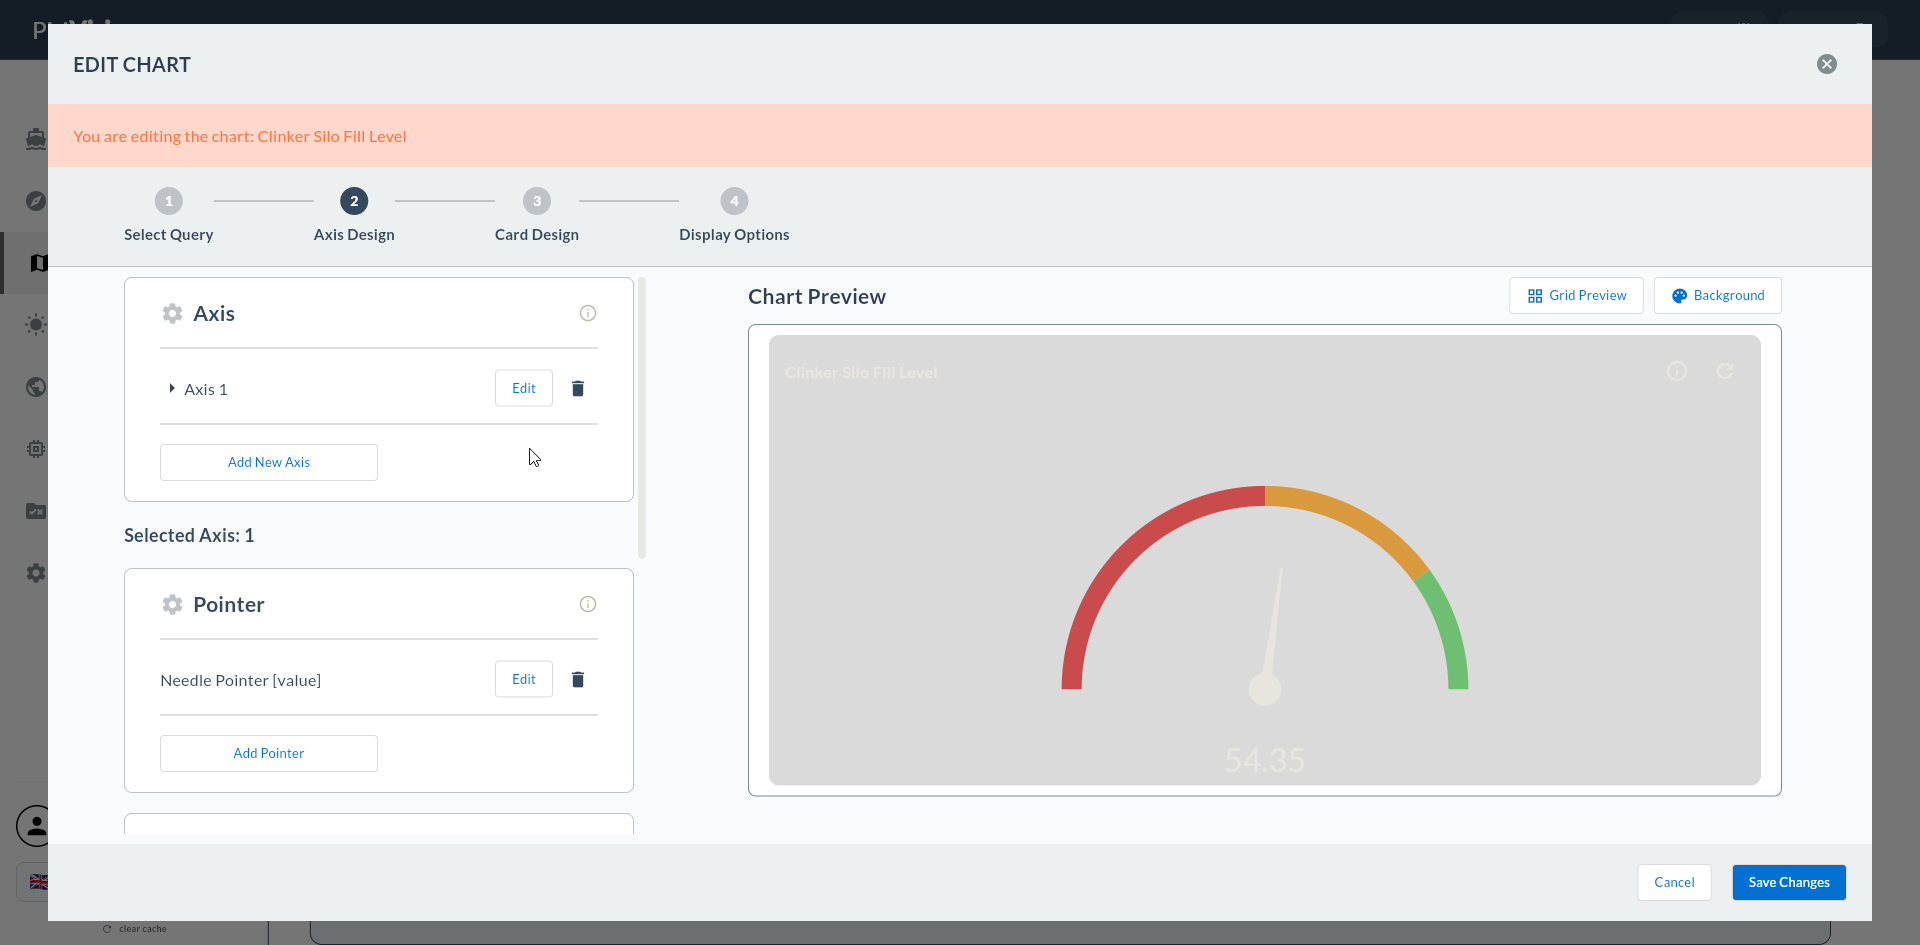
2. Chart Type Selection — Radial Gauge
In the second step you select Radial Gauge from the 2 chart types in the Gauge group. This selection triggers the /cartography/add/radialgaugeaxisdesign route to open in Step 4, and causes Steps 5/6/7 to be skipped.
Wizard route: /cartography/add/selectchart
1. Review the Type List
The 2 chart types of the Gauge group are listed in the left column.
2. Gauge Types
| Chart Type | Typical Use | Step 4 Screen |
|---|---|---|
| Radial Gauge | Circular pointer gauge | Radial Gauge Axis Design |
| Linear Gauge | Horizontal/vertical progress bar | Linear Gauge Axis Design |
3. Select Radial Gauge
Click the Radial Gauge card. The card is highlighted with a bold green border.
Click the Next button at the top right.

Proceeding Without Selecting a Type
If no type is selected, Next gives a warning.
Linear Gauge Is a Different Flow
For Linear Gauge → Linear Gauge Flow
Skipped Steps
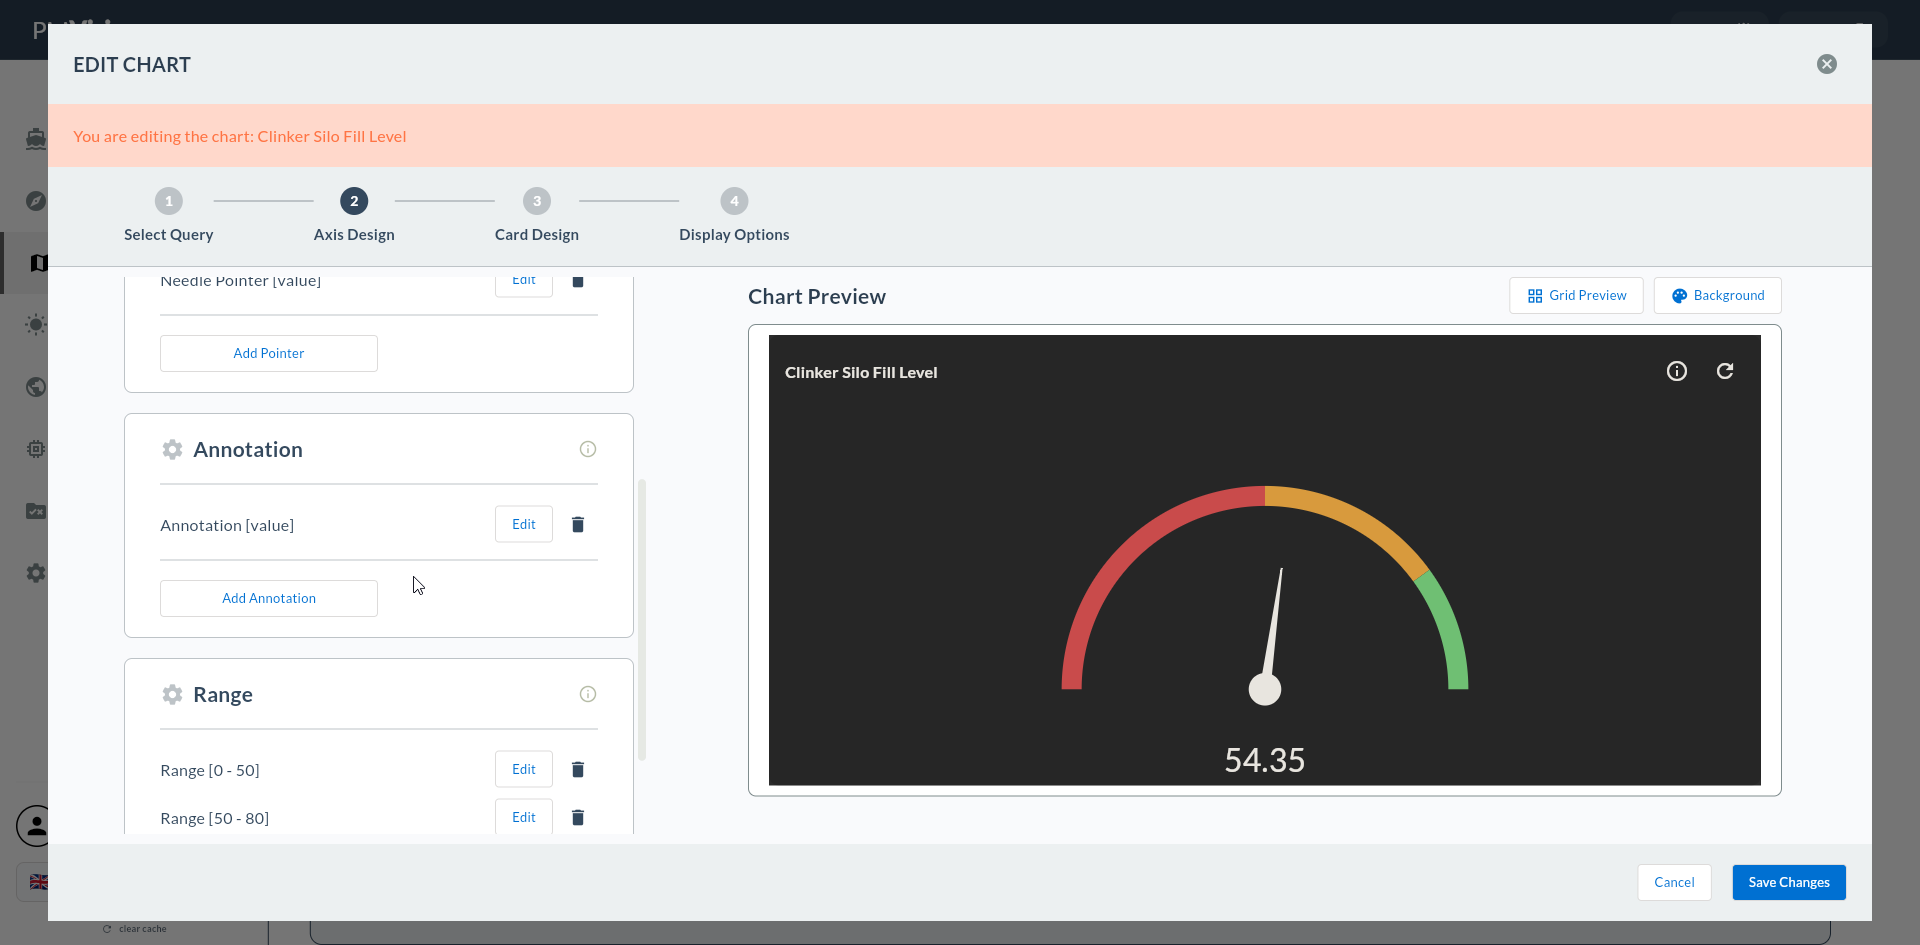
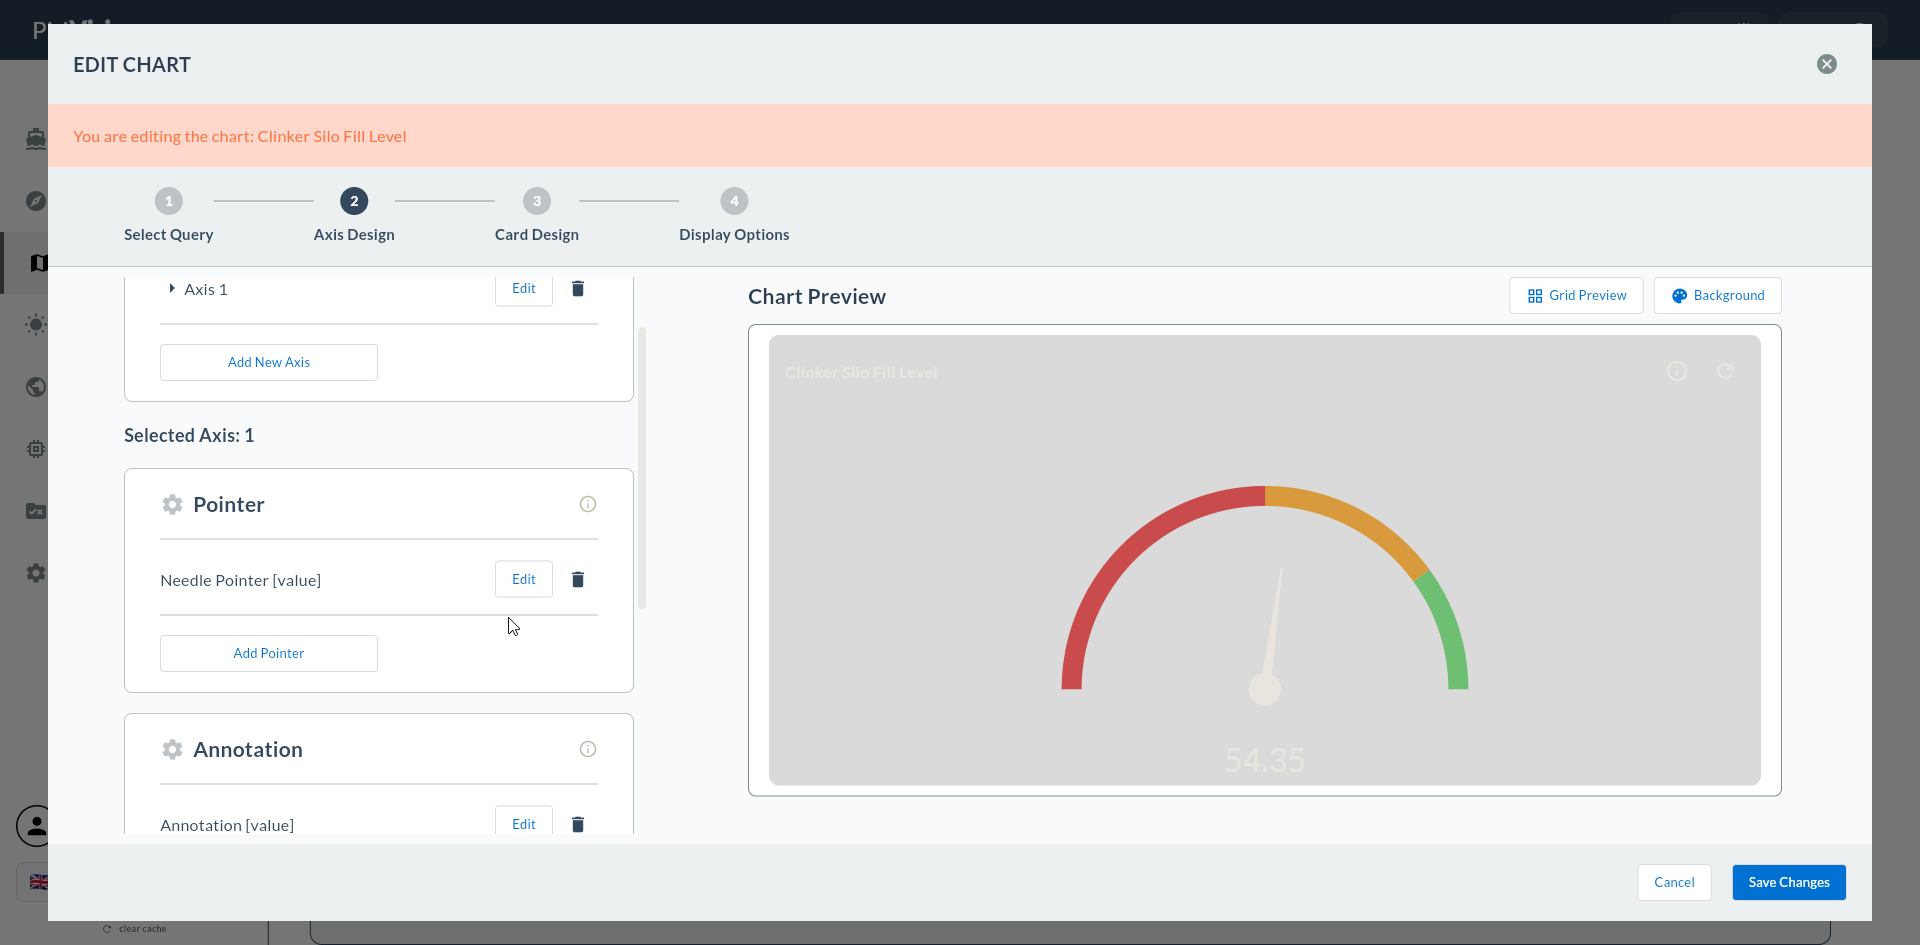
When Radial Gauge is selected, 5. Series Design, 6. Add Series, and 7. General Design are skipped. All visual settings are configured in Step 4's Axis Design.