Create PostgreSQL Query
This page explains the process of writing and saving a query against a PostgreSQL data source in the Pirivision Compass module.
Prerequisite — Port Data Source
To create this query, a PostgreSQL data source must be defined in the Port module. If none exists yet, go to Port and create a connection first.
Information Needed Before Creating
The examples on this page use the Demo Factory PostgreSQL dataset and the Demo Factory - PostgreSQL data source in Port. To generate the same data in your own environment, see Synthetic Data Generation — PostgreSQL.
| Information | Description | Default | Example |
|---|---|---|---|
| Data Source | A PostgreSQL connection added in Port | — | Demo Factory - PostgreSQL |
| Query Name | The name shown in the Compass list | — | sensor_time_trend |
| SQL Statement | The PostgreSQL query to run | — | SELECT ts, sicaklik FROM sensor_zaman_serisi WHERE ts >= {{start_date}}::timestamp AND ts <= {{end_date}}::timestamp AND hat_id = {{hat_id}} ORDER BY ts |
| Description | Purpose of the query | — | Line 1 temperature/pressure time series (last 24h) |
| Global Variable | If the query uses {{...}} |
— | hat_id (Text, default HAT-1) |
| Target Folder | Compass folder | Root | Demo Factory / Sensors |
Cache Duration
PostgreSQL queries are cached for 300 seconds by default. Lower this value for data that needs frequent updates.
1. Open the Compass Module
Click Compass in the left menu.
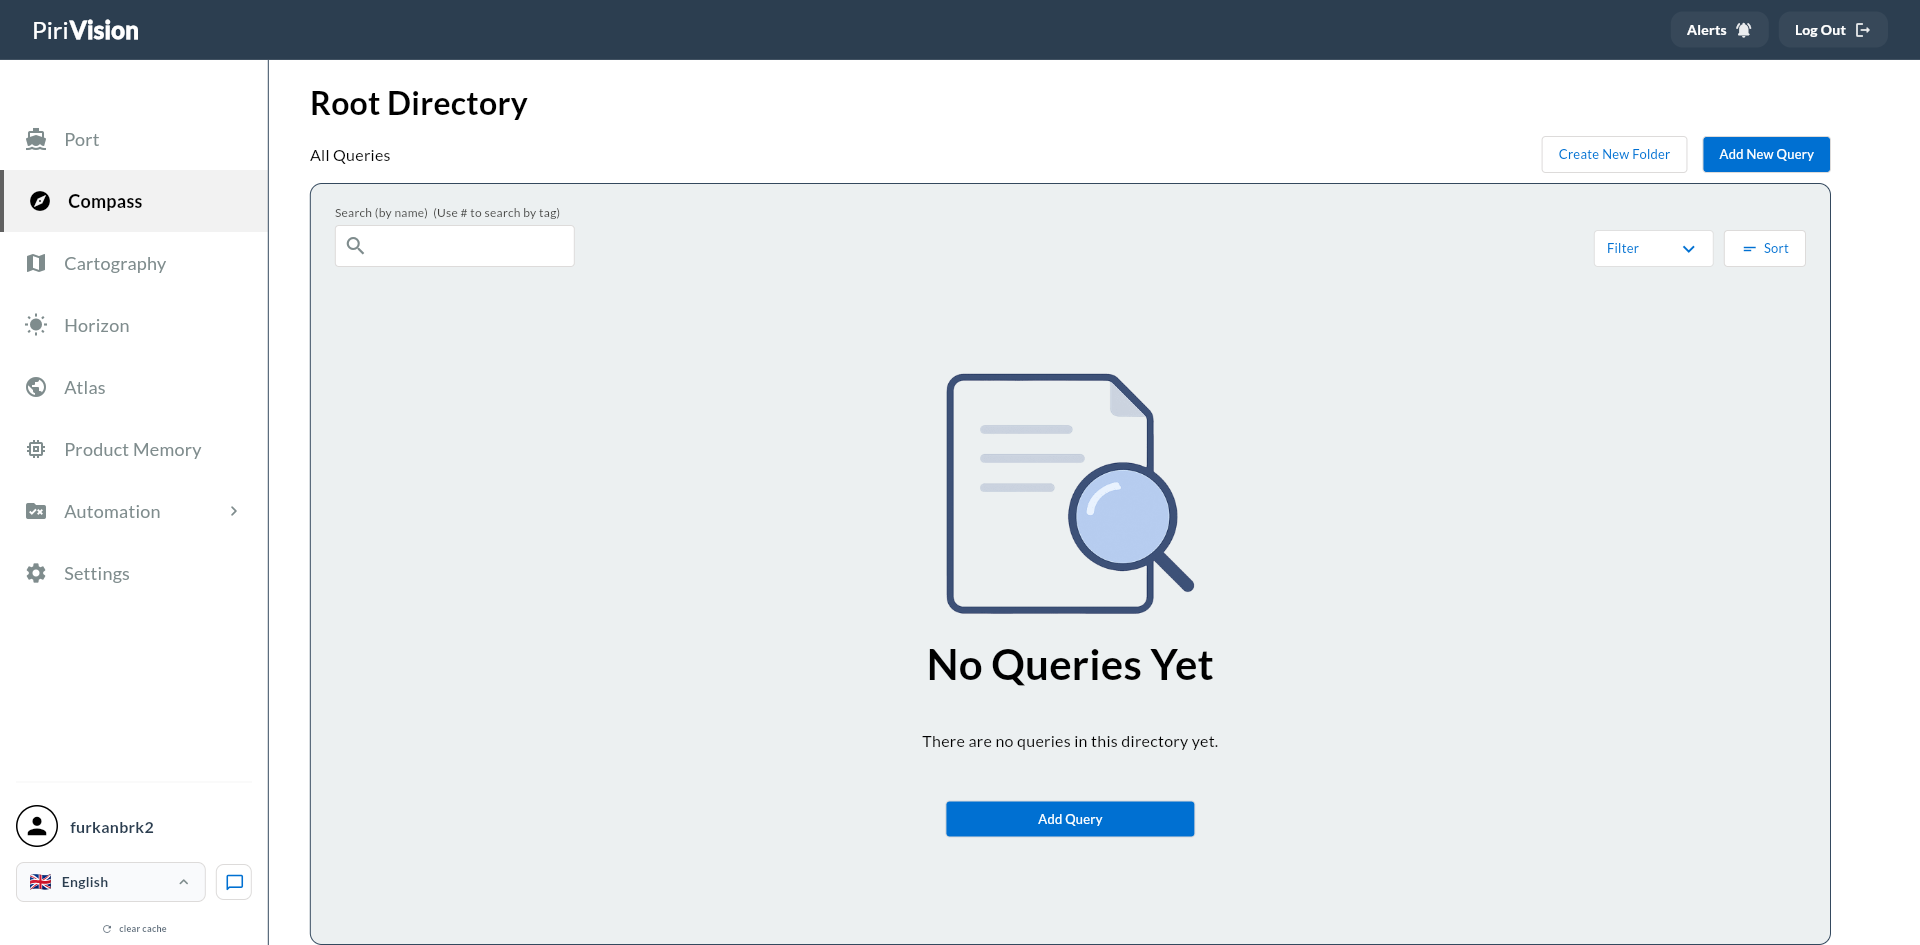
2. Create a New Query
Click the Add New Query button at the top right.
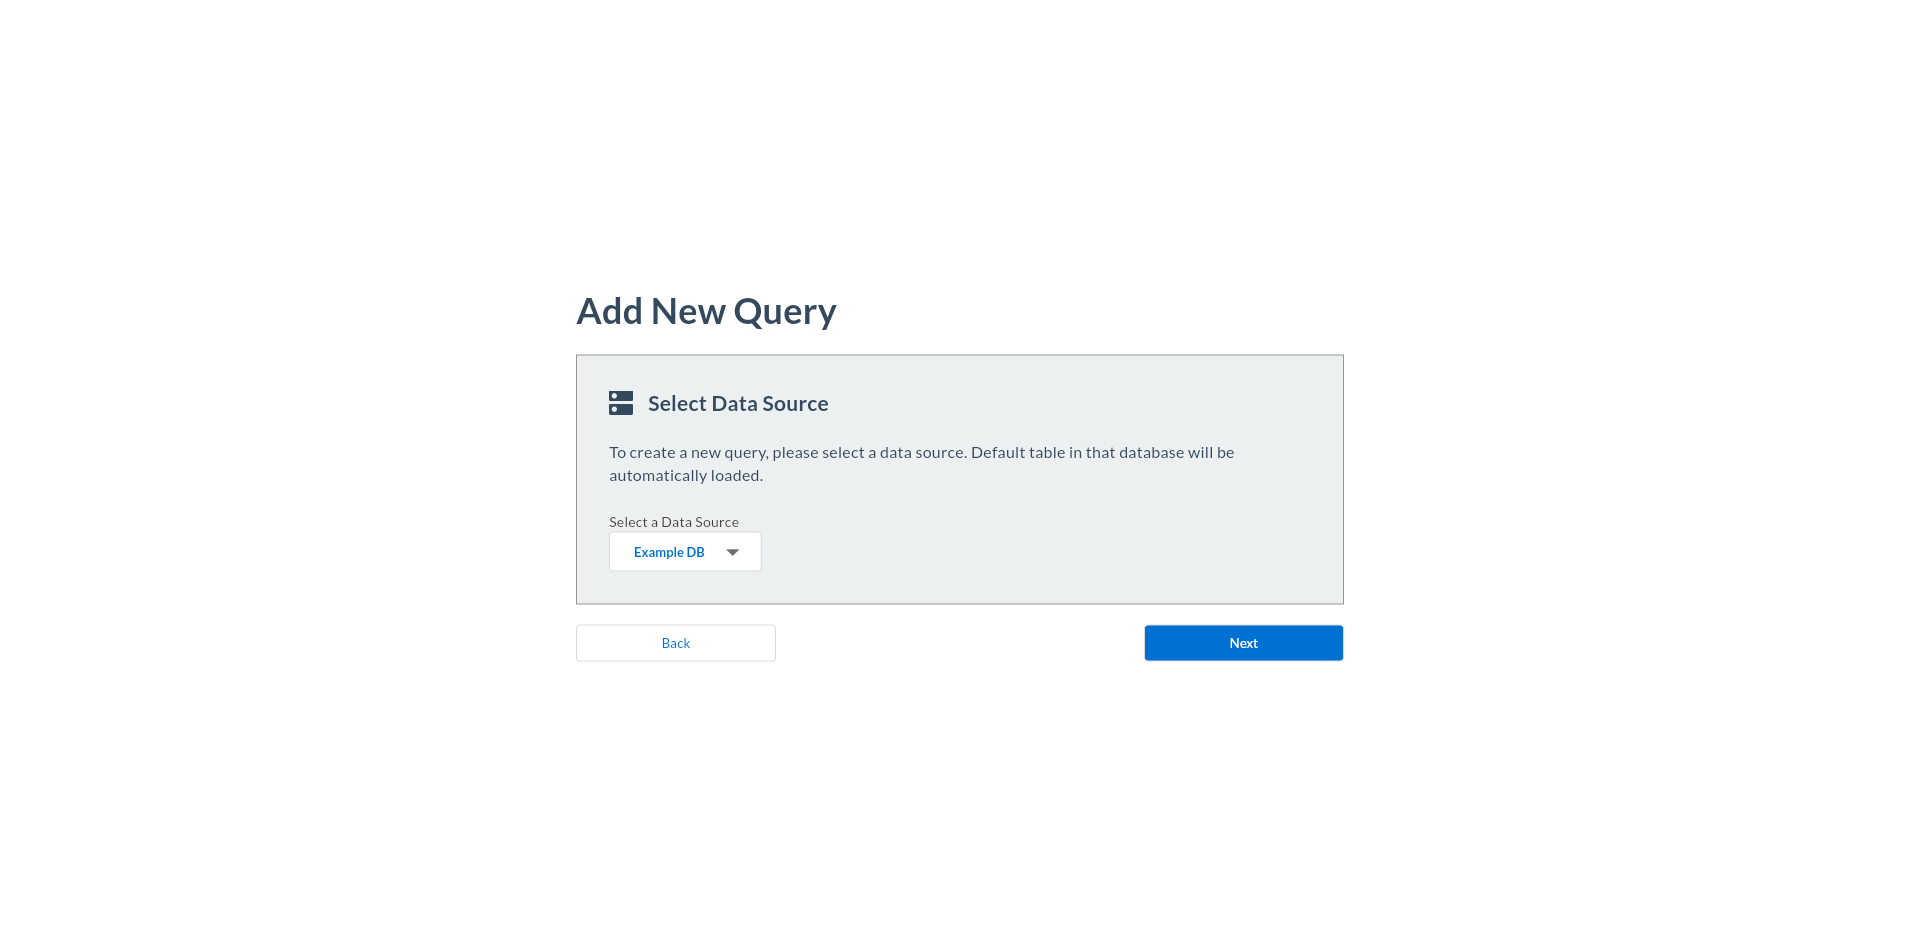
3. Pick a PostgreSQL Data Source
On the Select Your Data Source screen, pick the data source of type PostgreSQL.
Click Next.
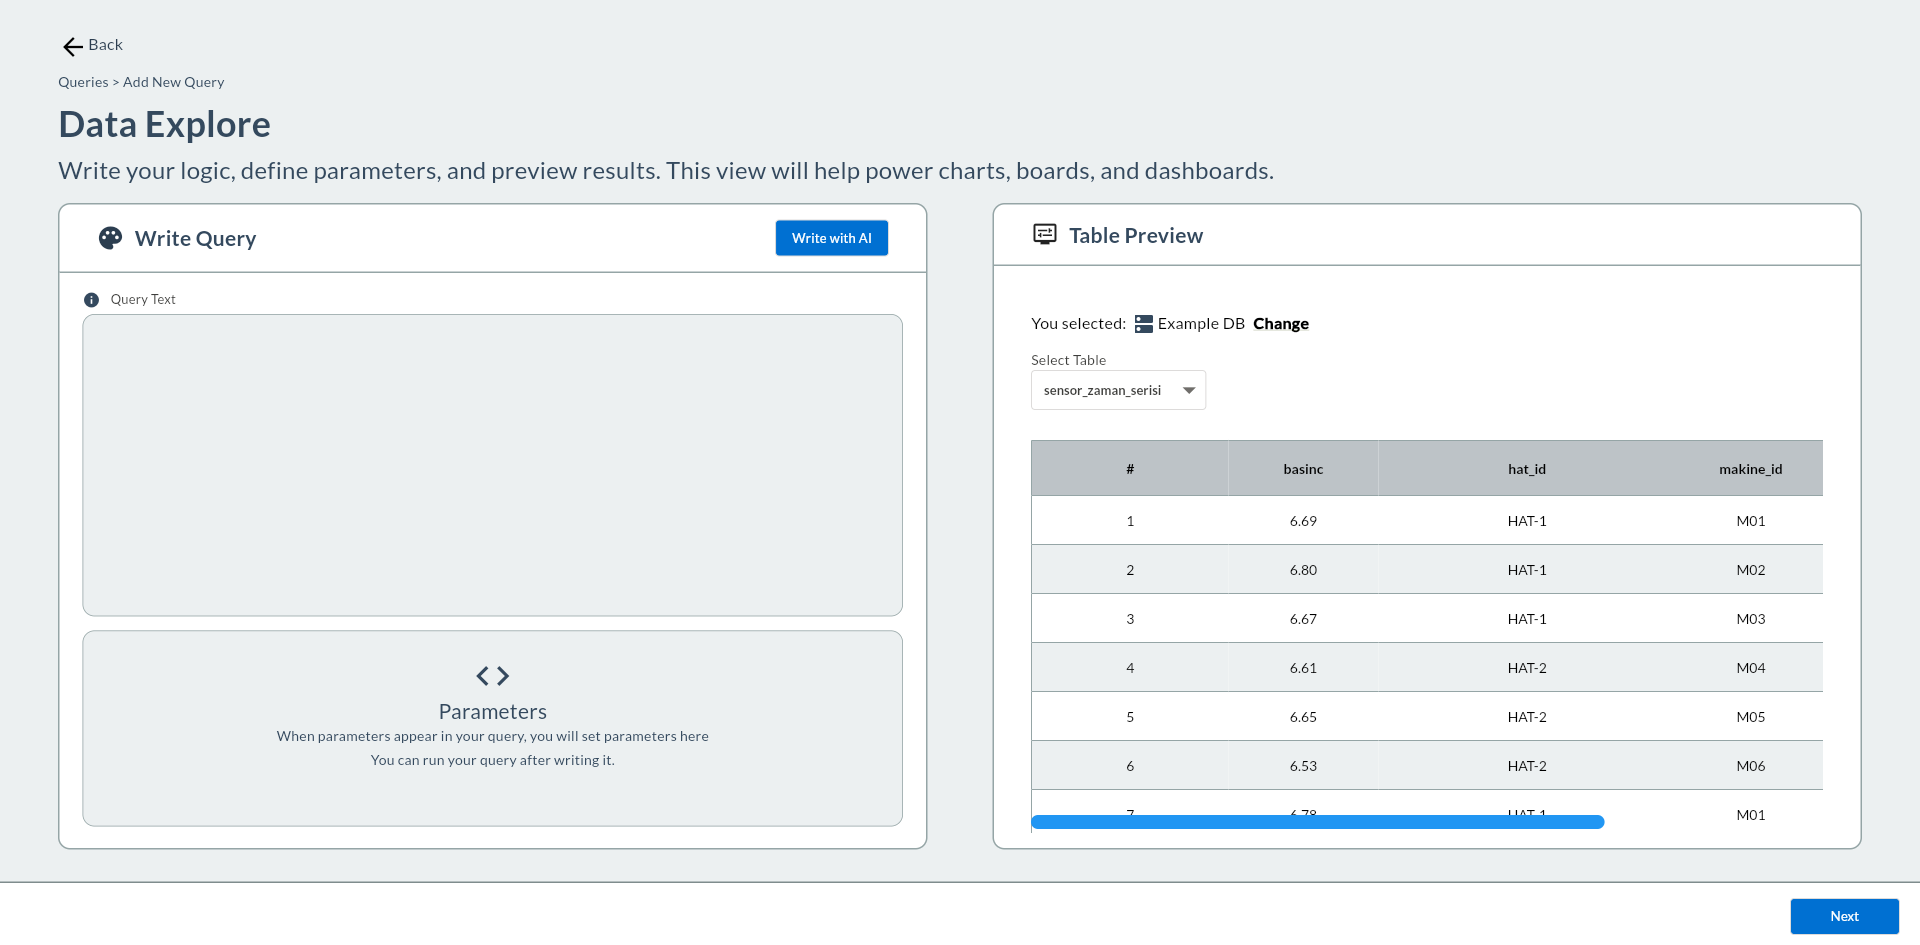
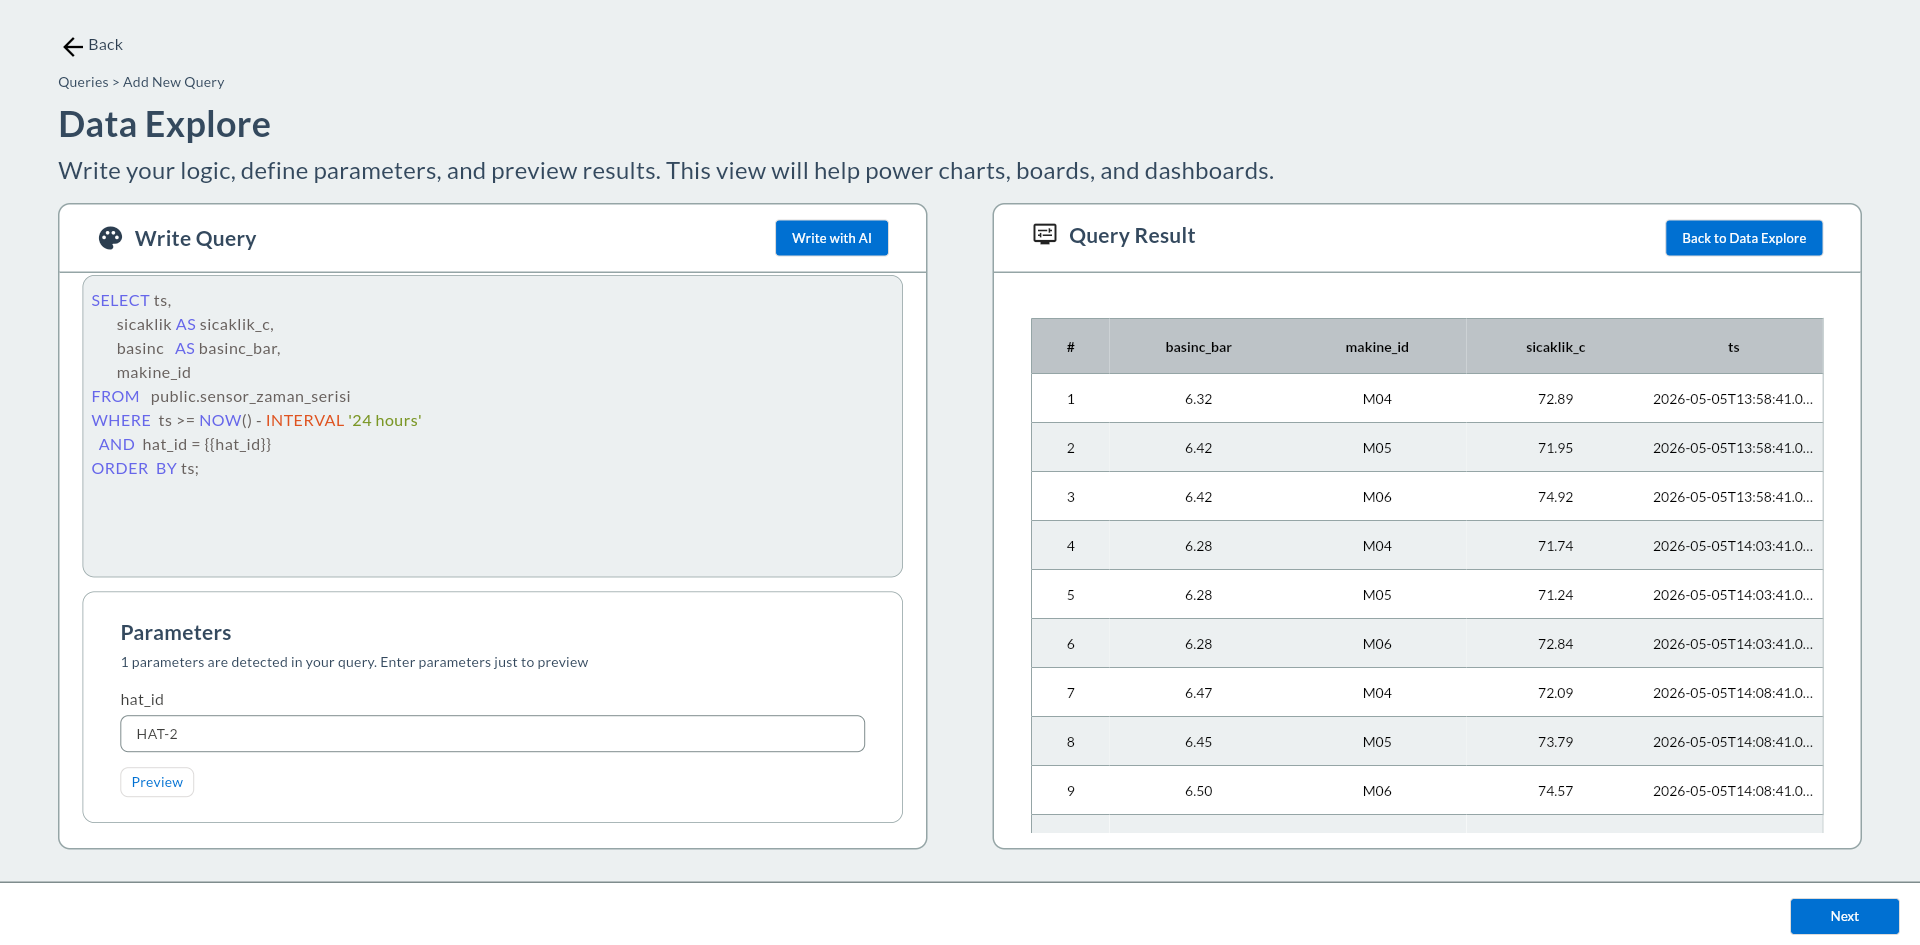
4. The SQL Editor Opens
The PostgreSQL SQL editor screen opens.

| Section | Description |
|---|---|
| Write Query | SQL code editor — PostgreSQL syntax highlighting active |
| Parameters | {{parameter}} variables in the query are listed automatically; values entered for preview |
| Table Preview | Right panel shows raw data of the selected table — change tables via the Select Table dropdown |
| Write with AI | Generate or improve a query from natural language |
| Next | Saves the query and proceeds to parameter settings |
5. Write the PostgreSQL Query
Parameter syntax
Use double curly braces like {{hat_id}}. The backend converts this token to a $1 placeholder automatically. If you wrap it in single quotes ('{{hat_id}}') the query becomes the literal '$1' and returns 0 rows.
-- Time series — last 24 hours, parameterized line (Demo Factory)
SELECT ts,
    sicaklik AS temperature_c,
    basinc   AS pressure_bar,
       makine_id
FROM   sensor_zaman_serisi
WHERE  ts >= NOW() - INTERVAL '24 hours'
  AND  hat_id = {{hat_id}}
ORDER  BY ts;
-- Hourly average temperature with DATE_TRUNC
SELECT DATE_TRUNC('hour', ts) AS hour,
             makine_id,
       AVG(sicaklik)          AS avg_temperature
FROM   sensor_zaman_serisi
WHERE  ts >= {{start_date}}::timestamp
    AND  ts <= {{end_date}}::timestamp
    AND  hat_id = {{hat_id}}
GROUP  BY saat, makine_id
ORDER  BY saat;
-- JOIN with lookup tables — machine brand and product family name
SELECT v.ts,
       v.makine_id,
       m.marka,
       m.model,
       v.vardiya,
    u.ad         AS product_family,
       v.uretim_adet
FROM   vardiya_uretim   v
JOIN   makineler        m ON m.makine_id = v.makine_id
JOIN   urun_aileleri    u ON u.urun_kodu = v.urun_kodu
WHERE  v.ts >= {{start_date}}::timestamp
    AND  v.ts <= {{end_date}}::timestamp
    AND  v.hat_id = {{hat_id}}
ORDER  BY v.ts DESC, v.makine_id
LIMIT  100;
-- Instant KPI — latest OEE value (ideal for a Radial Gauge)
SELECT ROUND(oee_yuzde, 1) AS oee
FROM   oee_gunluk
WHERE  hat_id = {{hat_id}}
ORDER  BY ts DESC
LIMIT  1;
Parameter syntax: {{parameter_name}} — written without quotes; defined as a Global Variable on save. The backend converts the {{hat_id}} token to a $1 placeholder automatically; if you wrap it in single quotes ('{{hat_id}}') the query becomes the literal '$1' and returns 0 rows.
PostgreSQL-specific notes:
- Use ::timestamp for string → timestamp conversion ({{start_date}}::timestamp)
- Use INTERVAL '{{day}} days' instead of INTERVAL '7 days' for a dynamic range
- If a table is not found, verify the correct DB is selected on the Port connection
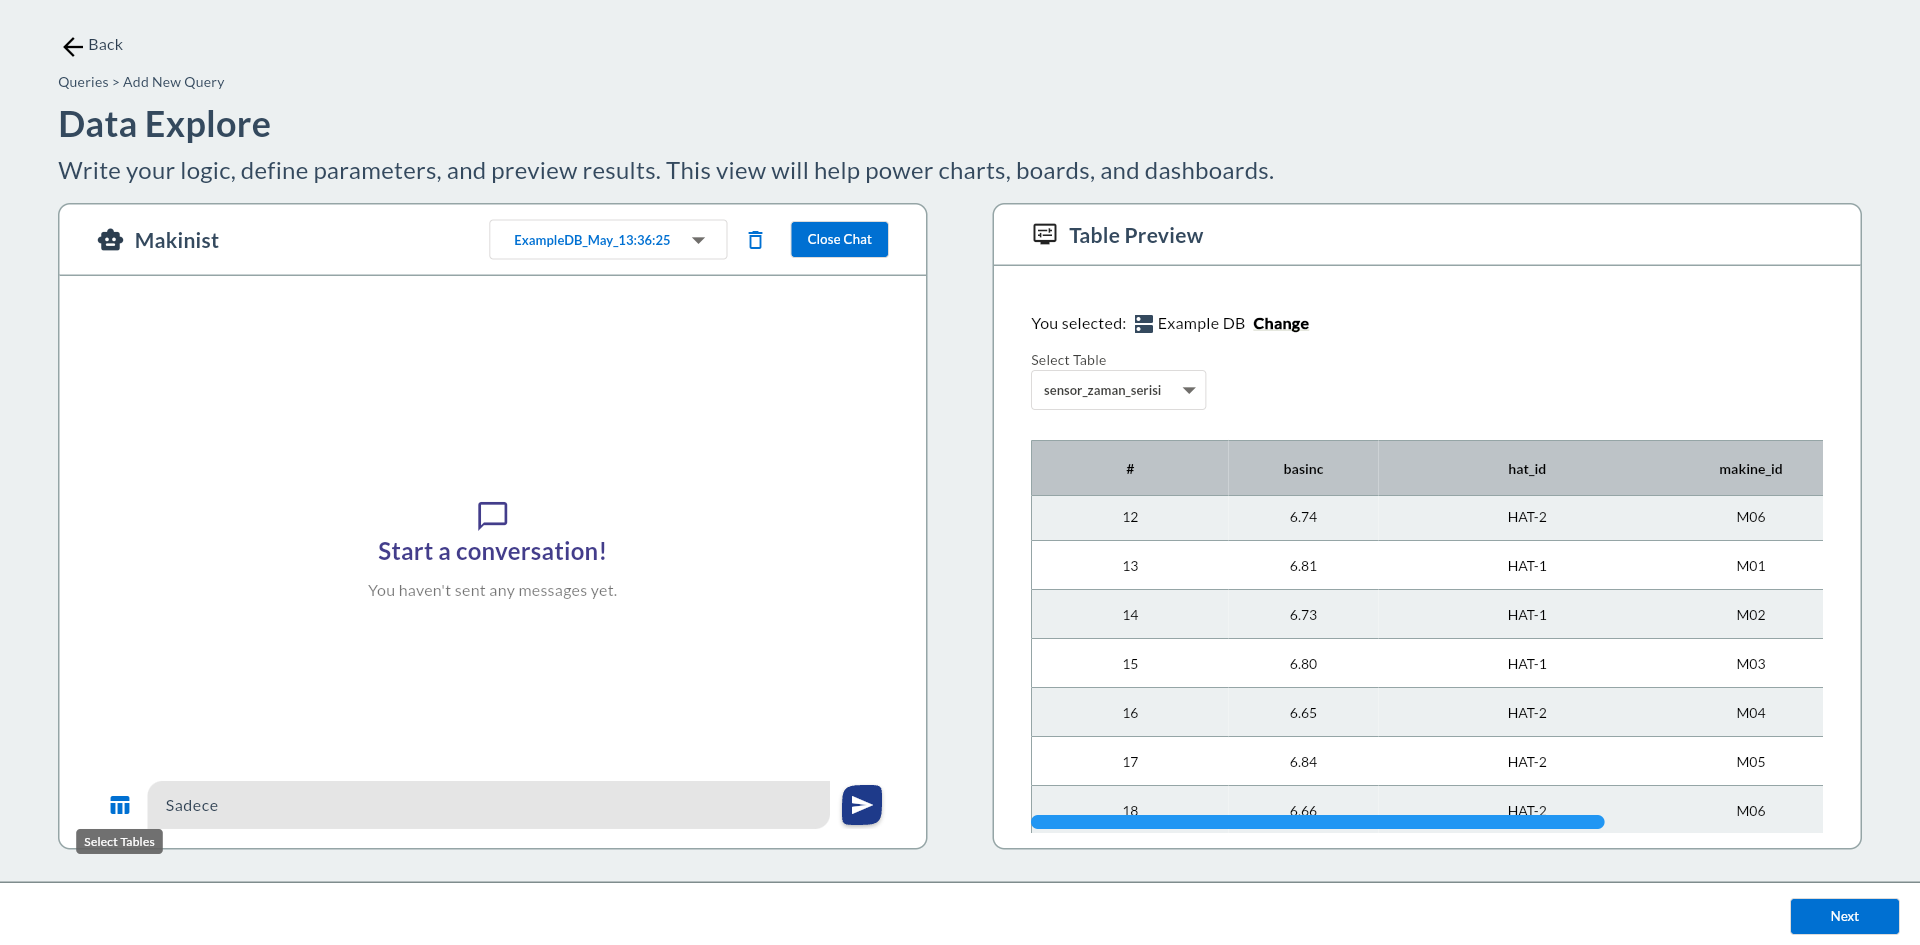
6. Write with Makinist (AI)
What is Makinist?
Makinist is the AI assistant built into the Compass SQL editor. Select your database tables as context, describe what you need in plain language, and Makinist returns a ready-to-run PostgreSQL query. Responses are generated via Langflow and session history is preserved.
In the Data Explore screen, click the Write with AI button in the top-right corner of the Write Query panel.
The Makinist panel opens on the left; the right-side Table Preview remains active.
| UI Element | Description |
|---|---|
| Makinist heading + 🤖 icon | Indicates the left panel has switched to chat mode |
| Session dropdown | Switch between past sessions; format: {DataSource}_{Month}_{HH:mm:ss} |
| 🗑️ Delete icon | Deletes the active session from Langflow; opens a new empty session |
| Close Chat | Closes the Makinist panel; returns to Write Query mode |
| ≡ (Select Tables) | Opens the table selection modal — no message can be sent without a table |
| Input + ▶ | Message composition and send area |
1. Select Tables
Click the ≡ (Select Tables) icon at the bottom-left. The Select Tables modal opens listing all tables in your PostgreSQL database as checkboxes.
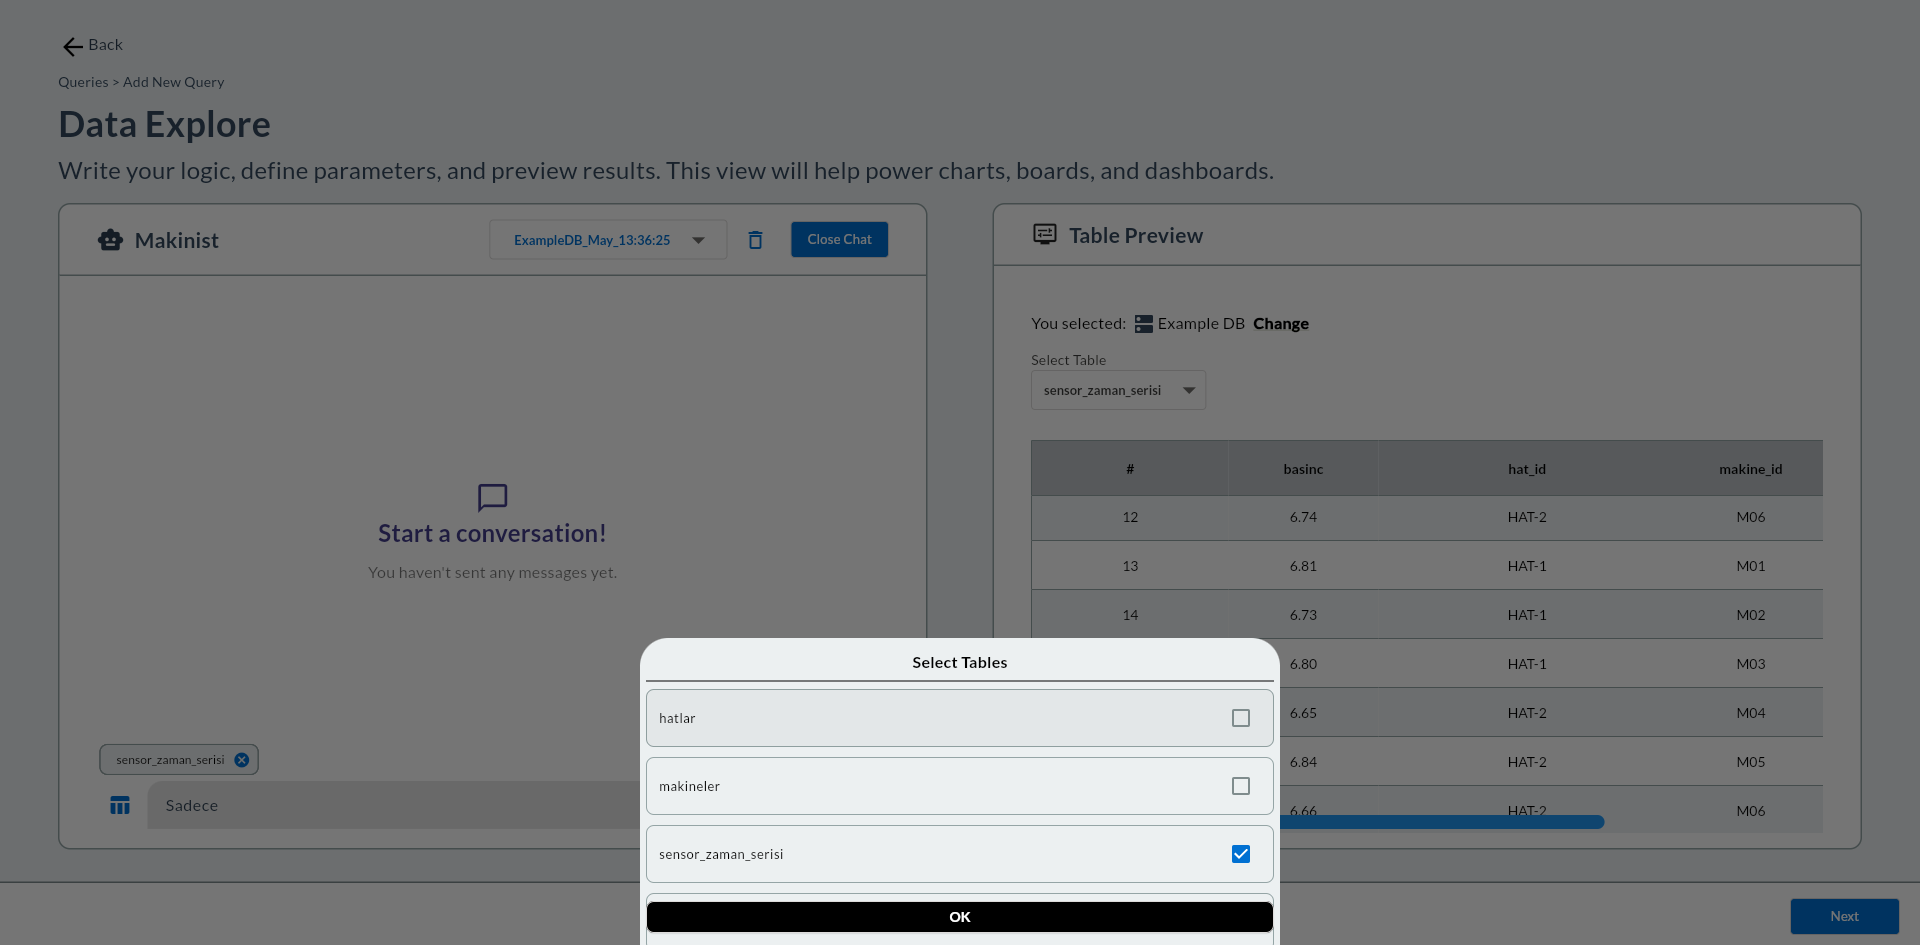
Check the table(s) you need and click OK. Selected tables appear as chips to the left of the input field; click the chip's × to remove individual tables.
Fewer tables, better results
Select only the minimum set of tables the query needs. Too many tables makes it harder for the model to find the right context. No message can be sent without at least one table selected.
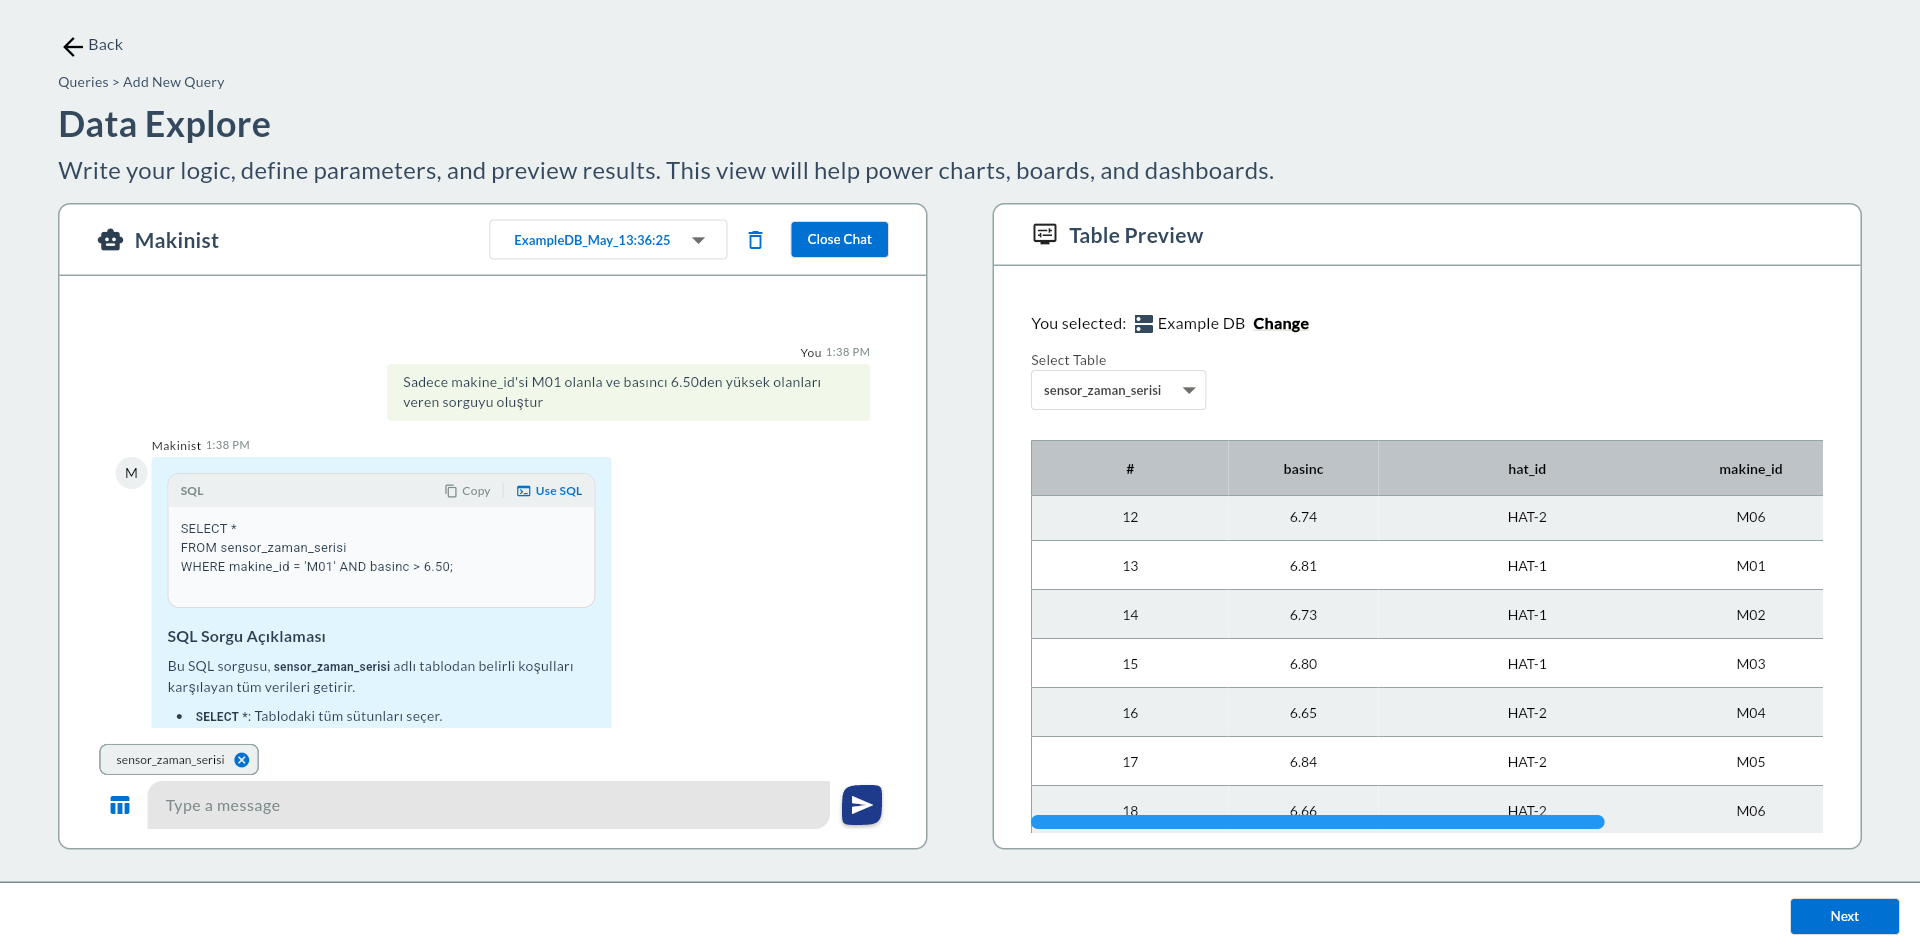
2. Type Your Request and Send
Type your request in English or Turkish and click ▶ (Send).
A typing... bubble appears while the response is being generated. Makinist's reply has two parts:
| Part | Description |
|---|---|
| User message | Shown in a greenish bubble on the right |
| SQL code block | Syntax-highlighted PostgreSQL code; Copy and Use SQL buttons at the top-right |
| SQL Query Explanation | Turkish text explaining what the query does — read it before applying |
3. Transfer SQL to the Editor
Click the Use SQL button on the SQL code block.
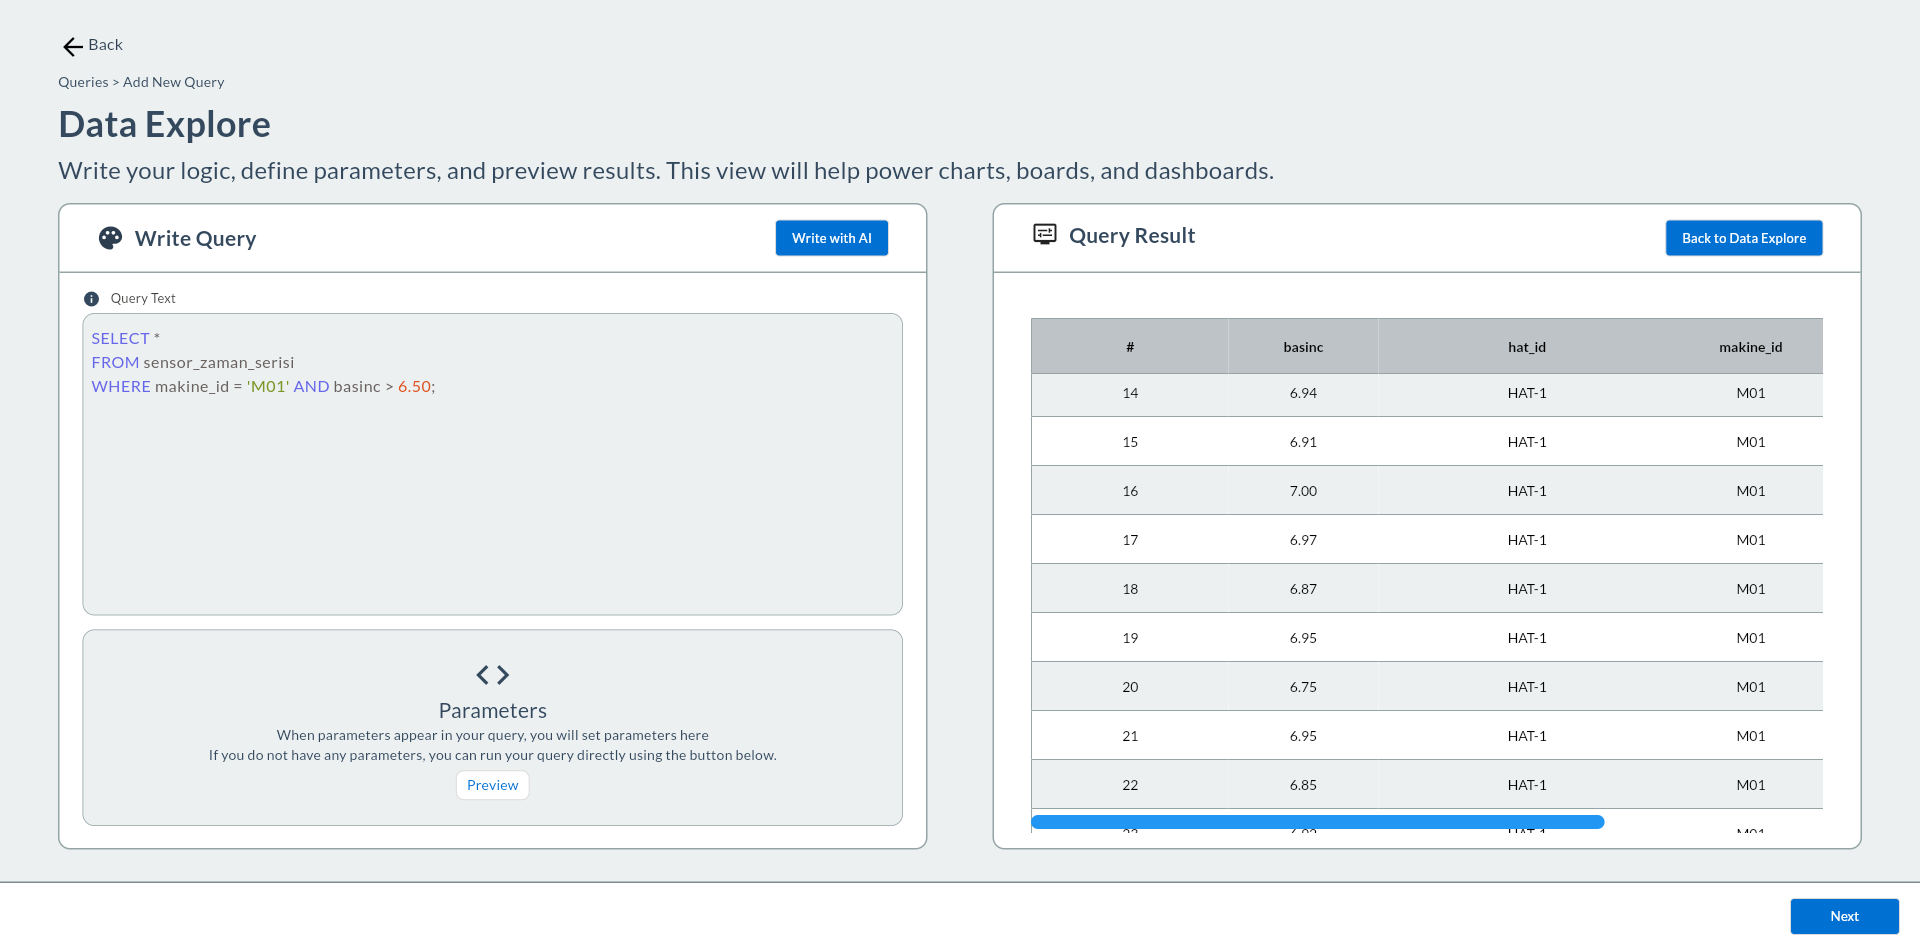
- The query is pasted into the Write Query editor with syntax highlighting.
- The right panel automatically switches to Query Result mode and runs the query.
- The Makinist panel closes; the Write with AI button reappears.
- Use Back to Data Explore (top-right) to return to the Table Preview.
Convert hardcoded values to parameters
Use SQL transfers and runs the query as-is. If the generated SQL contains hardcoded values like 'M01' or 6.50, replace them with {{makine_id}} / {{esik}} format and set default values in the Parameters section.
7. Use the Table Preview
Pick the desired table from the Select Table dropdown in the right Table Preview panel. Inspect the table columns and sample data to shape your SQL query.
8. Test the Query
Enter a parameter value in the Parameters section (e.g. hat_id = HAT-2) and click the Preview button. This value is for testing only; the real default (HAT-1) is set on the save panel.
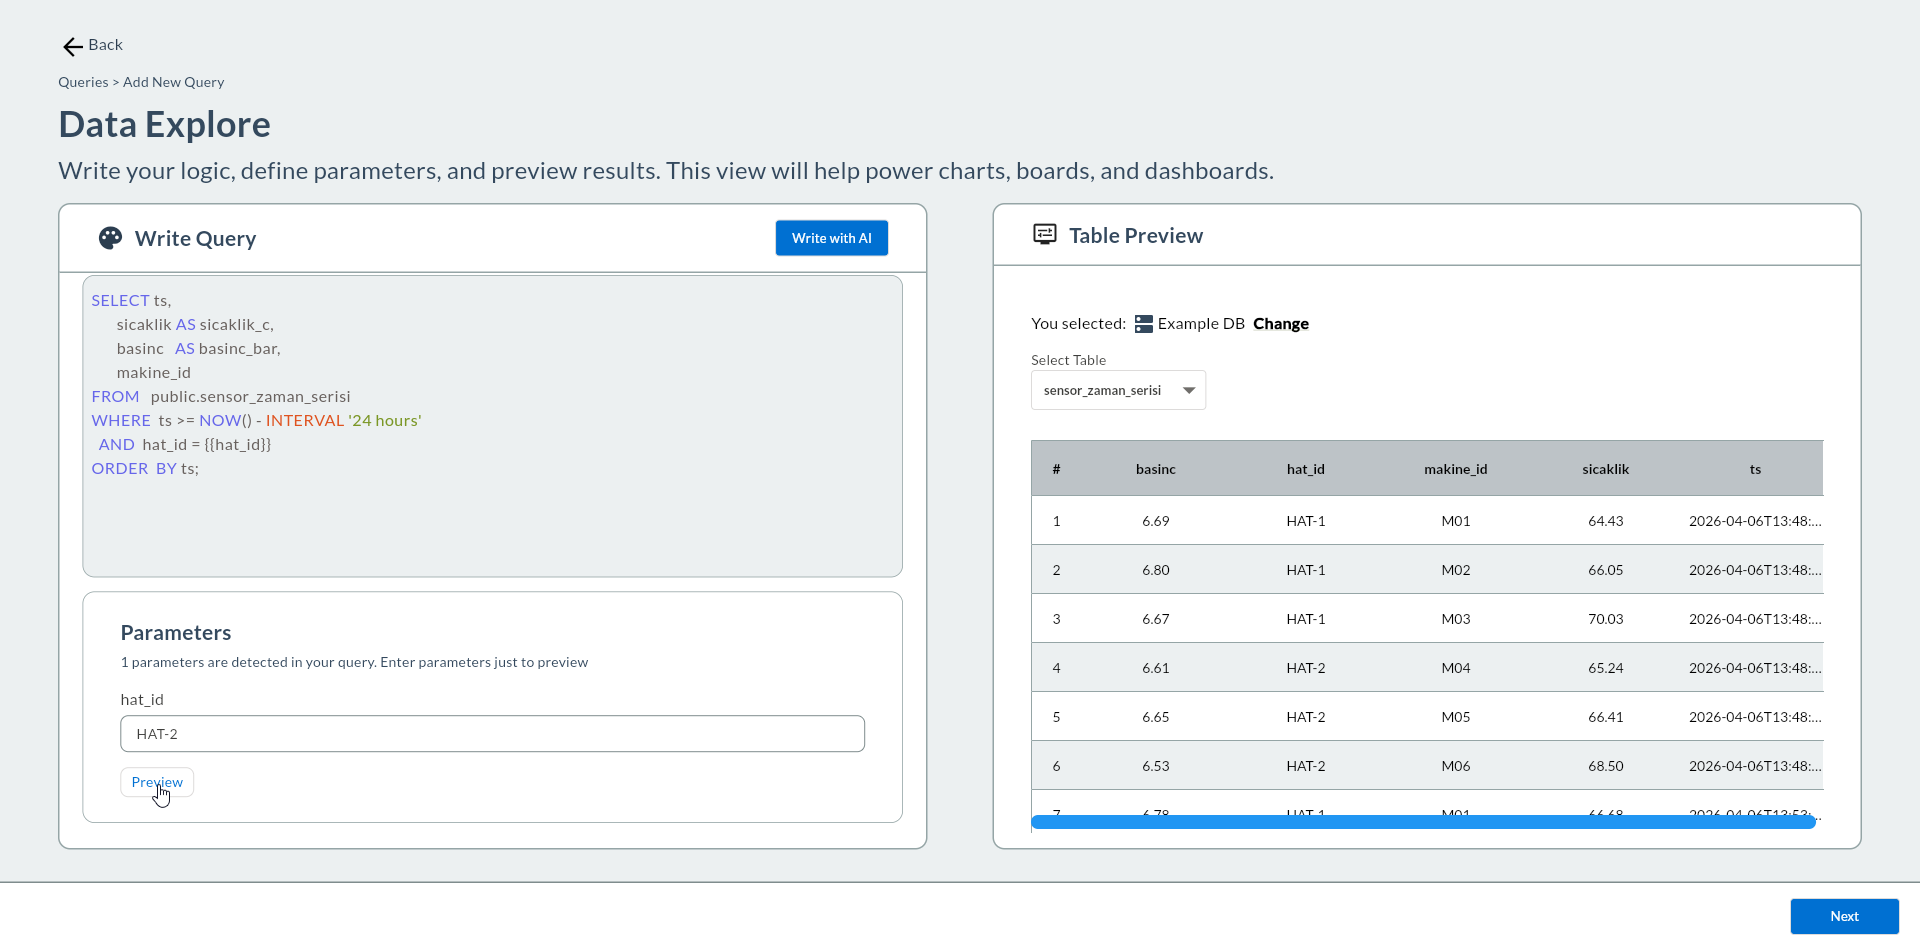
The Query Result section opens in the right panel and the filtered results appear in tabular form.
9. Save → Display Info
Click Next. The Set Parameters type and Default Values page opens.
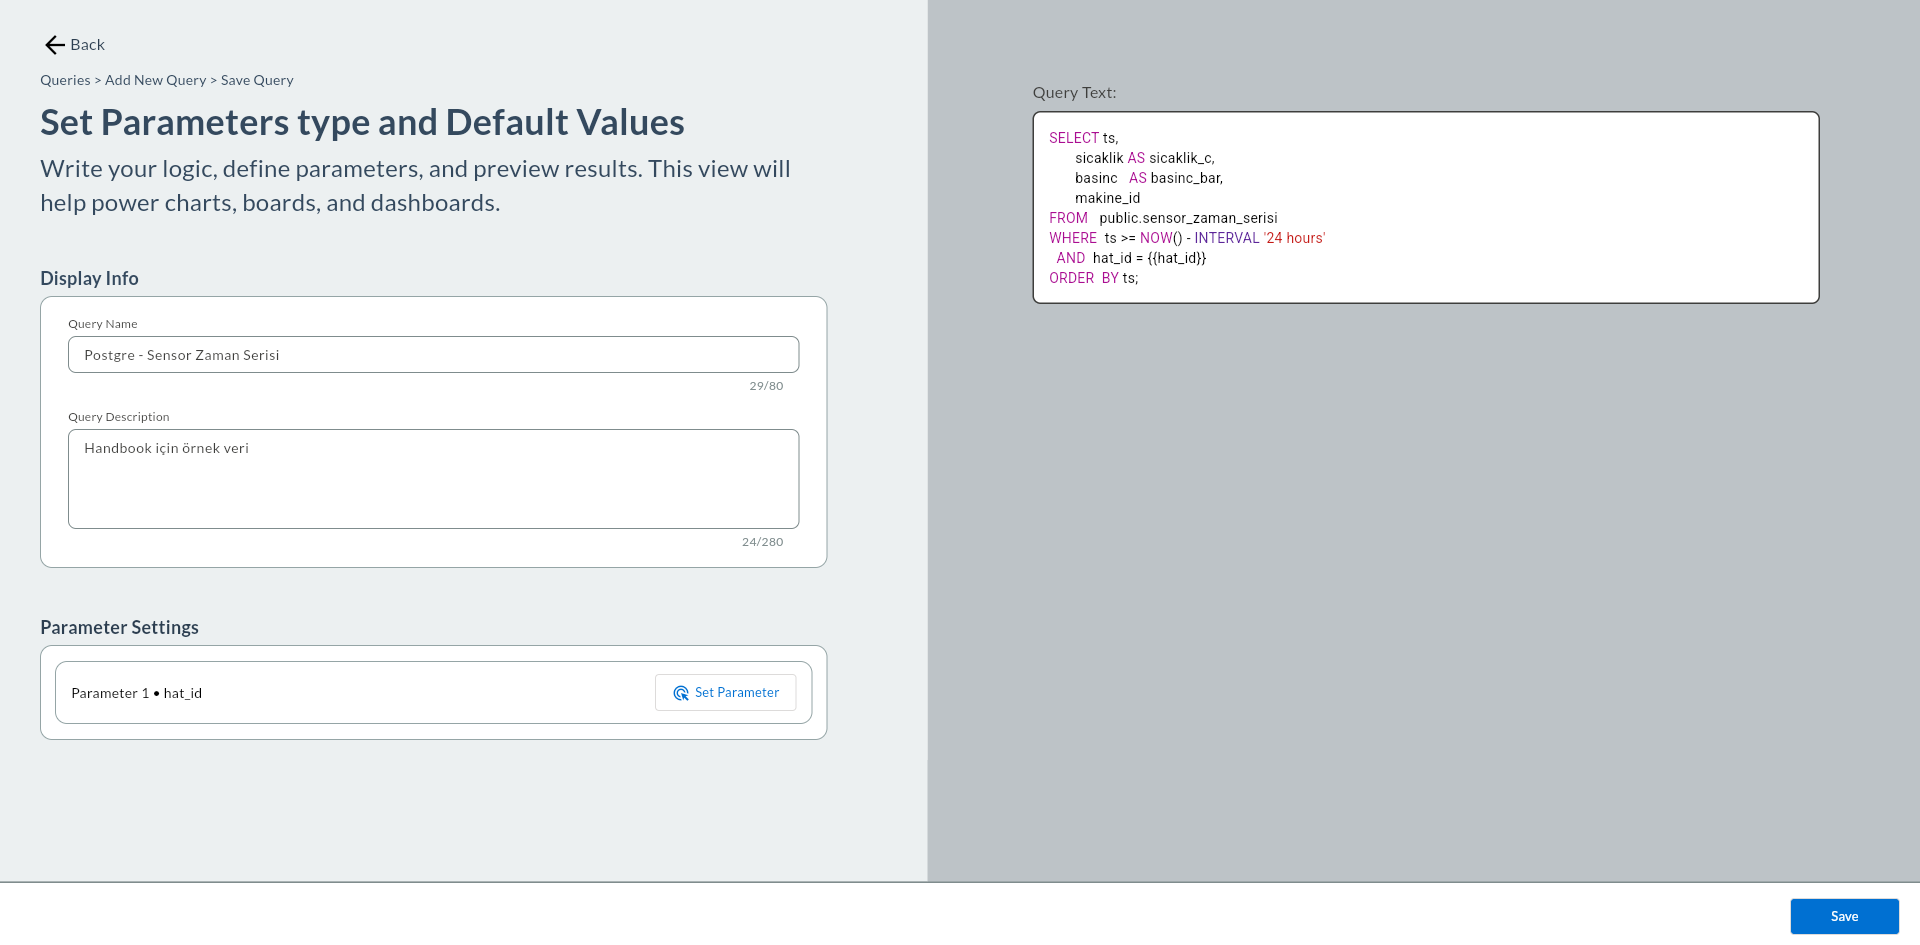
The query SQL appears on the right. Enter name and description on the left:
| Field | Required | Default | Example |
|---|---|---|---|
| Name | Yes | — | sensor_time_trend |
| Description | No | — | Line 1 temperature/pressure time series (last 24h) |
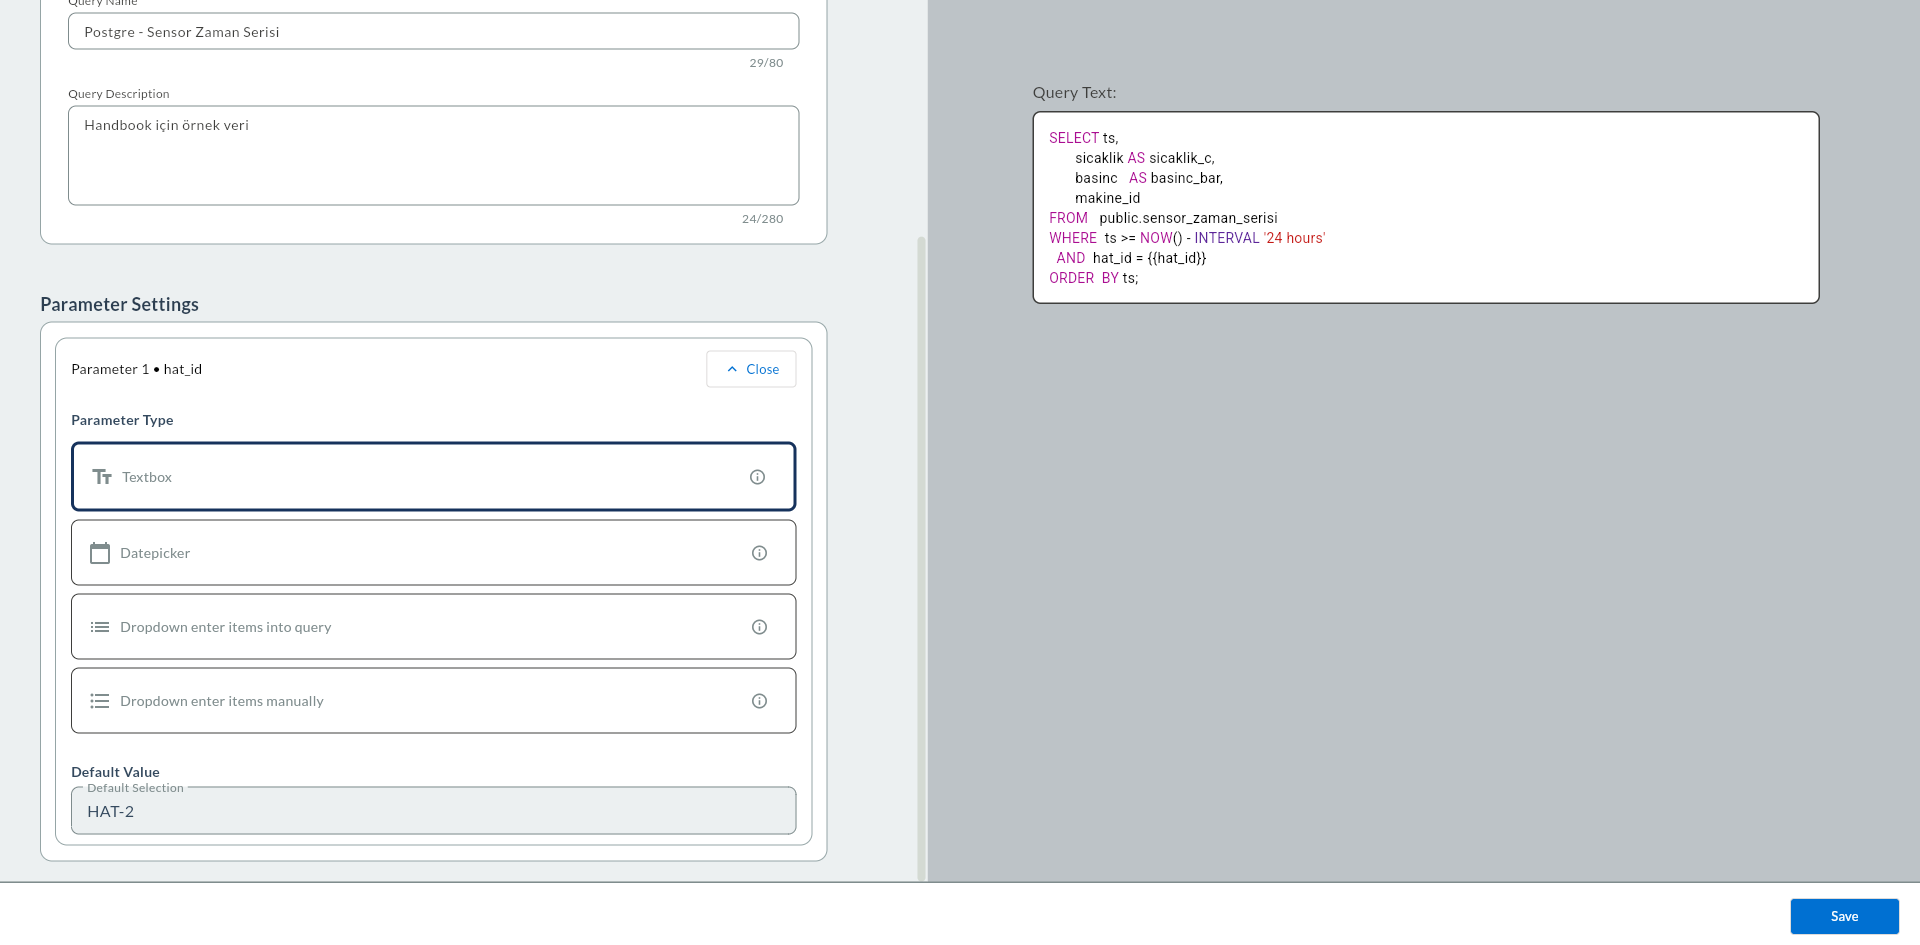
10. Global Variables (Parameters)
If the query uses {{parameter_name}}, they are listed automatically in the Parameter Settings section. For each parameter click Set Parameter to set type and default value:
| Field | Description | Options | Example |
|---|---|---|---|
| Parameter Type | Control type shown on the dashboard | Textbox / Datepicker / Dropdown (query) / Dropdown (manual) | Textbox |
| Default Value | Initial value | — | HAT-1 |
Demo Factory example
For the sensor_time_trend query, the hat_id parameter: Type Textbox, Default Value HAT-1. (For the recipe_parameter_list query, the makine_id parameter, Default M01.)
11. Location — Target Folder
Pick the folder from the Target Folder field. If not picked, the query is saved at the root.
12. Click Save
Click the Save button at the bottom of the panel. The query is saved to the Compass list.
13. Verify in the List
The new query card should appear in the Compass list.

14. Common Errors
| Error / Symptom | Possible Cause | Solution |
|---|---|---|
pq: password authentication failed for user "..." |
Wrong username or password | Update the PostgreSQL connection in Port |
pq: database "..." does not exist |
Wrong database name | Check the Database Name field in Port |
pq: relation "..." does not exist |
Table or view does not exist | Verify the table name; check that the correct DB is selected on the Port connection |
pq: column "..." does not exist |
Wrong column name | Check the column name in the table browser |
pq: syntax error at or near "..." |
SQL syntax error | Review the query; is :: casting correct? |
could not open target DB: dial tcp: i/o timeout |
PostgreSQL server unreachable | Check server address, port, and network access |
"you already have a query named '...'" |
A query with the same name exists | Enter a different name |
"could not get columns: ..." |
The query does not return columns | Make sure the query returns columns via SELECT |
| Query returns 0 rows | {{hat_id}} wrapped in single quotes ('{{hat_id}}') |
Remove the quotes: hat_id = {{hat_id}} |
relation "sensor_zaman_serisi" does not exist |
Demo Factory data not loaded | See Synthetic Data Generation — PostgreSQL |
| Parameter comes through empty | Global Variable not defined | Add the hat_id parameter on the save panel and give it a Default Value |
| Empty result table | The WHERE clause matches no data | Broaden the filter values and date range |